Pumpkin Spice Lattes are back at Starbuck so you know what that means… Pumpkin everything is hitting the shelves!! Fall is FINALLY right around the bend and I’ve got a few recipes I’d love to share this season, but what better way to start off than with pumpkin muffins and bread?
I really like this recipe because it’s a nice hint of that desired pumpkin taste, but isn’t overwhelming. The small touch of pumpkin in this bread is enough to get you in the fall spirit without easily tiring you out. It’s perfect for someone a little weary of the pumpkin spice trend AND for those who are all about it, might I say she’s a happy medium!
INSTRUCTIONS
Add your wet ingrdients, eggs, vanilla, pumpkin puree, sugar, and coconut oil to a medium size bowl and combine well, then set aside.
In your main bowl, combine flour, baking powder, baking soda, salt, cinnamon, clove, and ginger.
Add your wet ingredients to your dry and mix well.
Grease your pans well, then bake at 325 degrees for about 25 minutes for muffins or 45 for loaves. Be sure not to overbake in order to prevent your bread from drying out.
Every year at Christmas time, I invite over my closet girlfriends for a cookie day. We mix, we roll, we bake, and we decorate and really just have tons of fun. We find one or two fun and creative festive cookie recipes in advance, but the one we always make every year is gingerbread men. It’s a fun little tradition that my best friend and I started about 4 Christmases ago and it’s something we look forward to all year round. Gingerbread is not everyone’s cup of tea, but you can make them into ornaments or garlands to decorate your home if that’s the case! They smell very delicious and are always SUPER cute.
This batch makes so many cookies that even when there’s 5 people baking, there is enough for everyone to take home an equal abundance!
INSTRUCTIONS:
In a medium bowl, whisk together all your dry ingredients, which includes your flour, baking powder, baking soda, salt, ginger, cinnamon, and cloves, until well combined. Then set aside.
In your main, large bowl, beat your butter and brown sugar until well blended, then add the vanilla extract and molasses. Continue to beat while slowly adding your dry mixture 1 cup at a time until everything is smooth.
With your hands, gather your dough into a ball. Split the dough into two parts and cover both with cling wrap.
Place your wrapped dough into the refrigerator for up to 4 days, but no less than a few hours.
When ready to bake:
Preheat your oven to 375 degrees. Most recipes will tell you to line your baking pans with parchment paper, but my pans are nonstick and I have never had any issues removing my cookies from them without it. However, if you feel you need parchment paper, this is your time to line your baking sheets.
Remove your dough from the refrigerator and allow to start warming up to room temperature while you prep your counter, cutting board, or smooth dish rag. To do this, grab your flour and sprinkle it all over. (It will be messy. Baking is messy!) Rub your rolling pin with flour as well. This will help prevent the dough from sticking to your tools and flat surface.
Unwrap your dough and knead it around in your hands to soften it up if it’s not yet room temperature, then place in your workspace.
Take your pin roller and begin rolling your dough flat until it is about 2-3cm in thickness. You don’t want to roll it any thinner or it will burn during baking. If you are still having trouble with your dough sticking to the roller, sprinkle flour on top of your dough before continuing to roll. Grab your cookie cutters, cut, and bake!
Bake one sheet of cookies at a time for approximately 6-7 minutes.
I find the BEST tool to remove cookies from sheets is a metal spatula. I no longer have a metal one, but my silicone one did a fine job.
Cream Cheese Icing:
Throw all your ingredients into the bowl and blend with a hand mixer until smooth! (Yes, it’s THAT easy!)
INGREDIENTS:
3 cups all-purpose flour
3/4 cup brown sugar
6 tablespoons softened unsalted butter
1 large egg (or 2 small eggs)
1/2 cup molasses
2 teaspoons vanilla extract
1 1/2 teaspoons baking powder
3/4 teaspoons baking soda
1/4 teaspoon salt
1 tablespoon ground ginger
1 1/2 teaspoons ground cinnamon
1/4 teaspoon ground cloves
Cream Cheese Icing:
4 tablespoons cream cheese
1/2 softened unsalted butter
2 1/2 cups powdered sugar
1/2 cup heavy whipping cream
1 teaspoon vanilla extract
I would definitely recommend using a Kitchen Aid stand mixer for this dough because it’s very thick, but a hand mixer or stirring by hand can work as well, just will take a little more time and a lot of muscle! I have the one linked in the color ‘toffee’ and they have endless ones to choose from. These are the kitchen cooking utensils I have and absolutely love!
THANK YOU FOR READING! Tag me in your insta pics if you try this recipe! x Abigail, @abbvocado
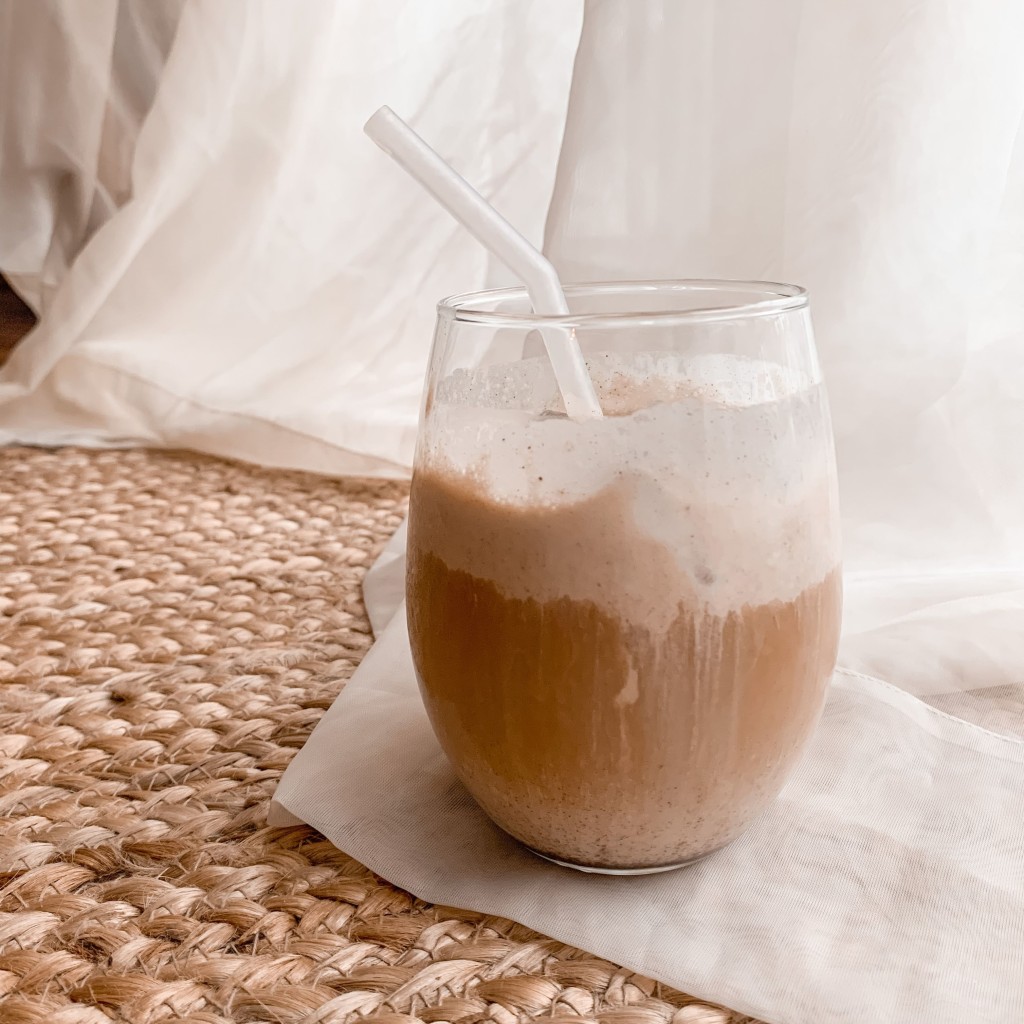
We all love the Starbucks pumpkin cold foam. We just do, it’s a fact. There’s nothing better than the sweet, creamy taste of it sinking down into our coffee as we drink it trying to slowly wake up in the morning. It’s just comforting and delightful to our tastebuds. I tried making it once before and it turned out so bad that I had to go online and find what would make it sweeter and allow the pumpkin not to be too overpowering. Alas, after I got a feel for the ingredients I would need, I trial and errored a few concoctions to come up with the perfect combination that tasted as close to the Starbucks cold foam as possible.
What else would I do but to share it with everyone?! After all, it is Thanksgiving and we all need this to be part of our holiday morning.
INSRTUCTIONS:
Take a small bowl and add all your ingredients to it at once.
Grab your hand mixer and only insert one beater, then proceed to plug in and mix your ingredients for about a minute until they are completely combined.
Pour over your coffee and enjoy!
–This recipe makes enough cold foam for two drinks. You can double it to make more if needed! If you prefer a lot of cold foam, it will probably need to be doubled to top more than one coffee equally.
INGREDIENTS:
1/2 cup heavy whipping cream
1/4 cup sweetened condensed milk
1 tbsp pumpkin pureé
1 tsp vanilla extract
1 tsp cinnamon
1 tsp powdered sugar
–A fun trick I learned recently is if you don’t have powdered sugar but have regular white granulated sugar, you can blend the granulated sugar and it will become powdered sugar. Makes perfect sense, but it’s not ever something I realized or thought about. You can also choose to go even lighter on the pumpkin pureé if you would like to mute the taste to even a smaller hint. I already curated it to be a small hint, but if you really don’t care for an obvious taste of pumpkin, I would suggest cutting it down to a half teaspoon and you should be good to go!
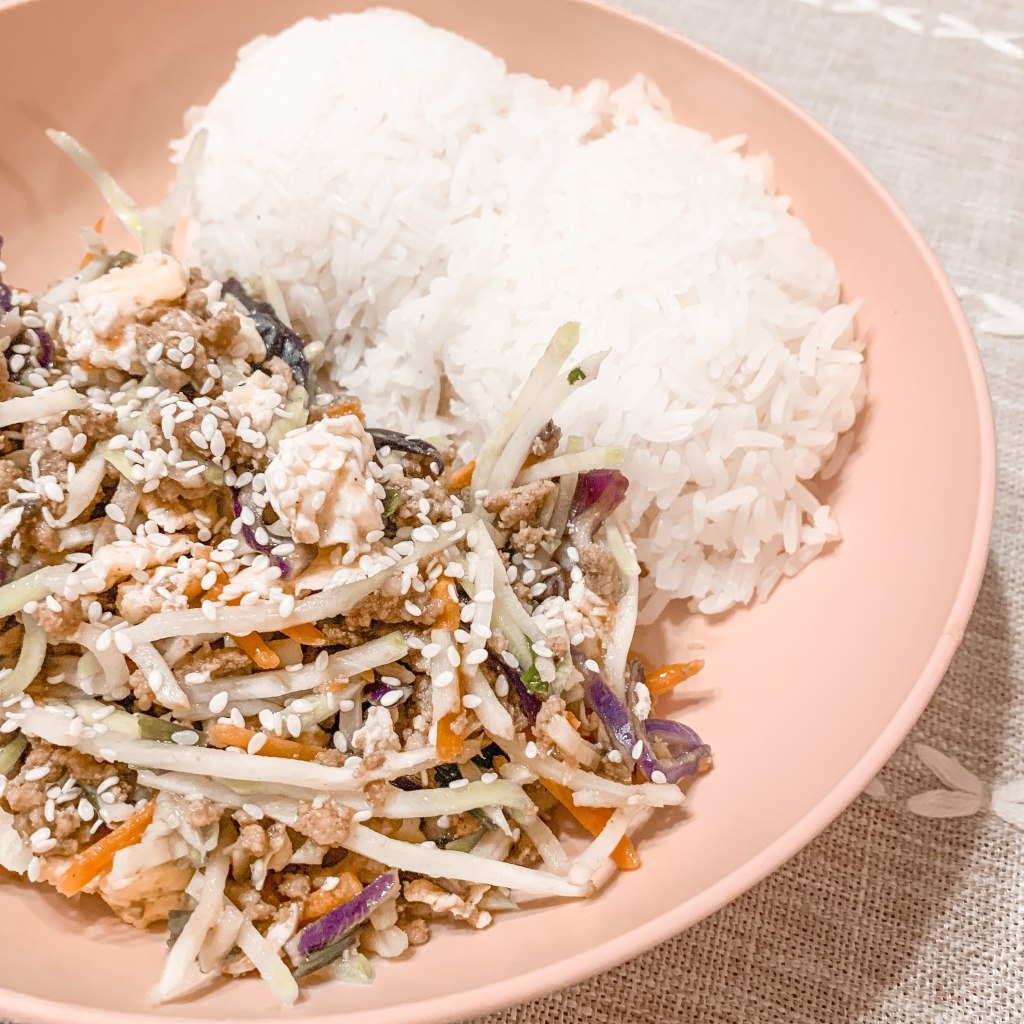
Over the summer I travelled to Virginia to spend the day with my Aunt who was visiting from Boston. She’s been making a lot of easy keto friendly recipes for her lunches and dinners and whipped this one up real quick for our lunch that day! I was a little unsure about it considering I don’t enjoy eating tons of meat, and I dislike sole slaw, however, this dish is SO GOOD. It was way better than I could have imagined. From this, I learned that I actually DO like slaw and ground turkey is not that bad. This was a dish totally outside of my comfort zone and it was way worth it.
DIRECTIONS:
I usually use a large stock pot that way I only use one pan and has a lid to cover for speedy cooking.
In your large pan and over a medium-high heat, fry your lightly beaten eggs and set aside.
Add olive and sesame oil to the pan still o the medium-high heat and cook your ground turkey until browned. Season with salt and pepper. Browning should take about 6-7 minutes.
Once browned, add your scallions, garlic, and ginger, then lower the heat to medium and contine to cook for 3 minutes.
Pour in your bag of coleslaw and mix it into the meat until the slaw is tender, then add the soy sauce and cooked eggs, stirring until everything in the pot is cooked through. Re-season with salt and pepper if needed.
Serve and sprinkle with sesame seeds for garnish and enjoy!
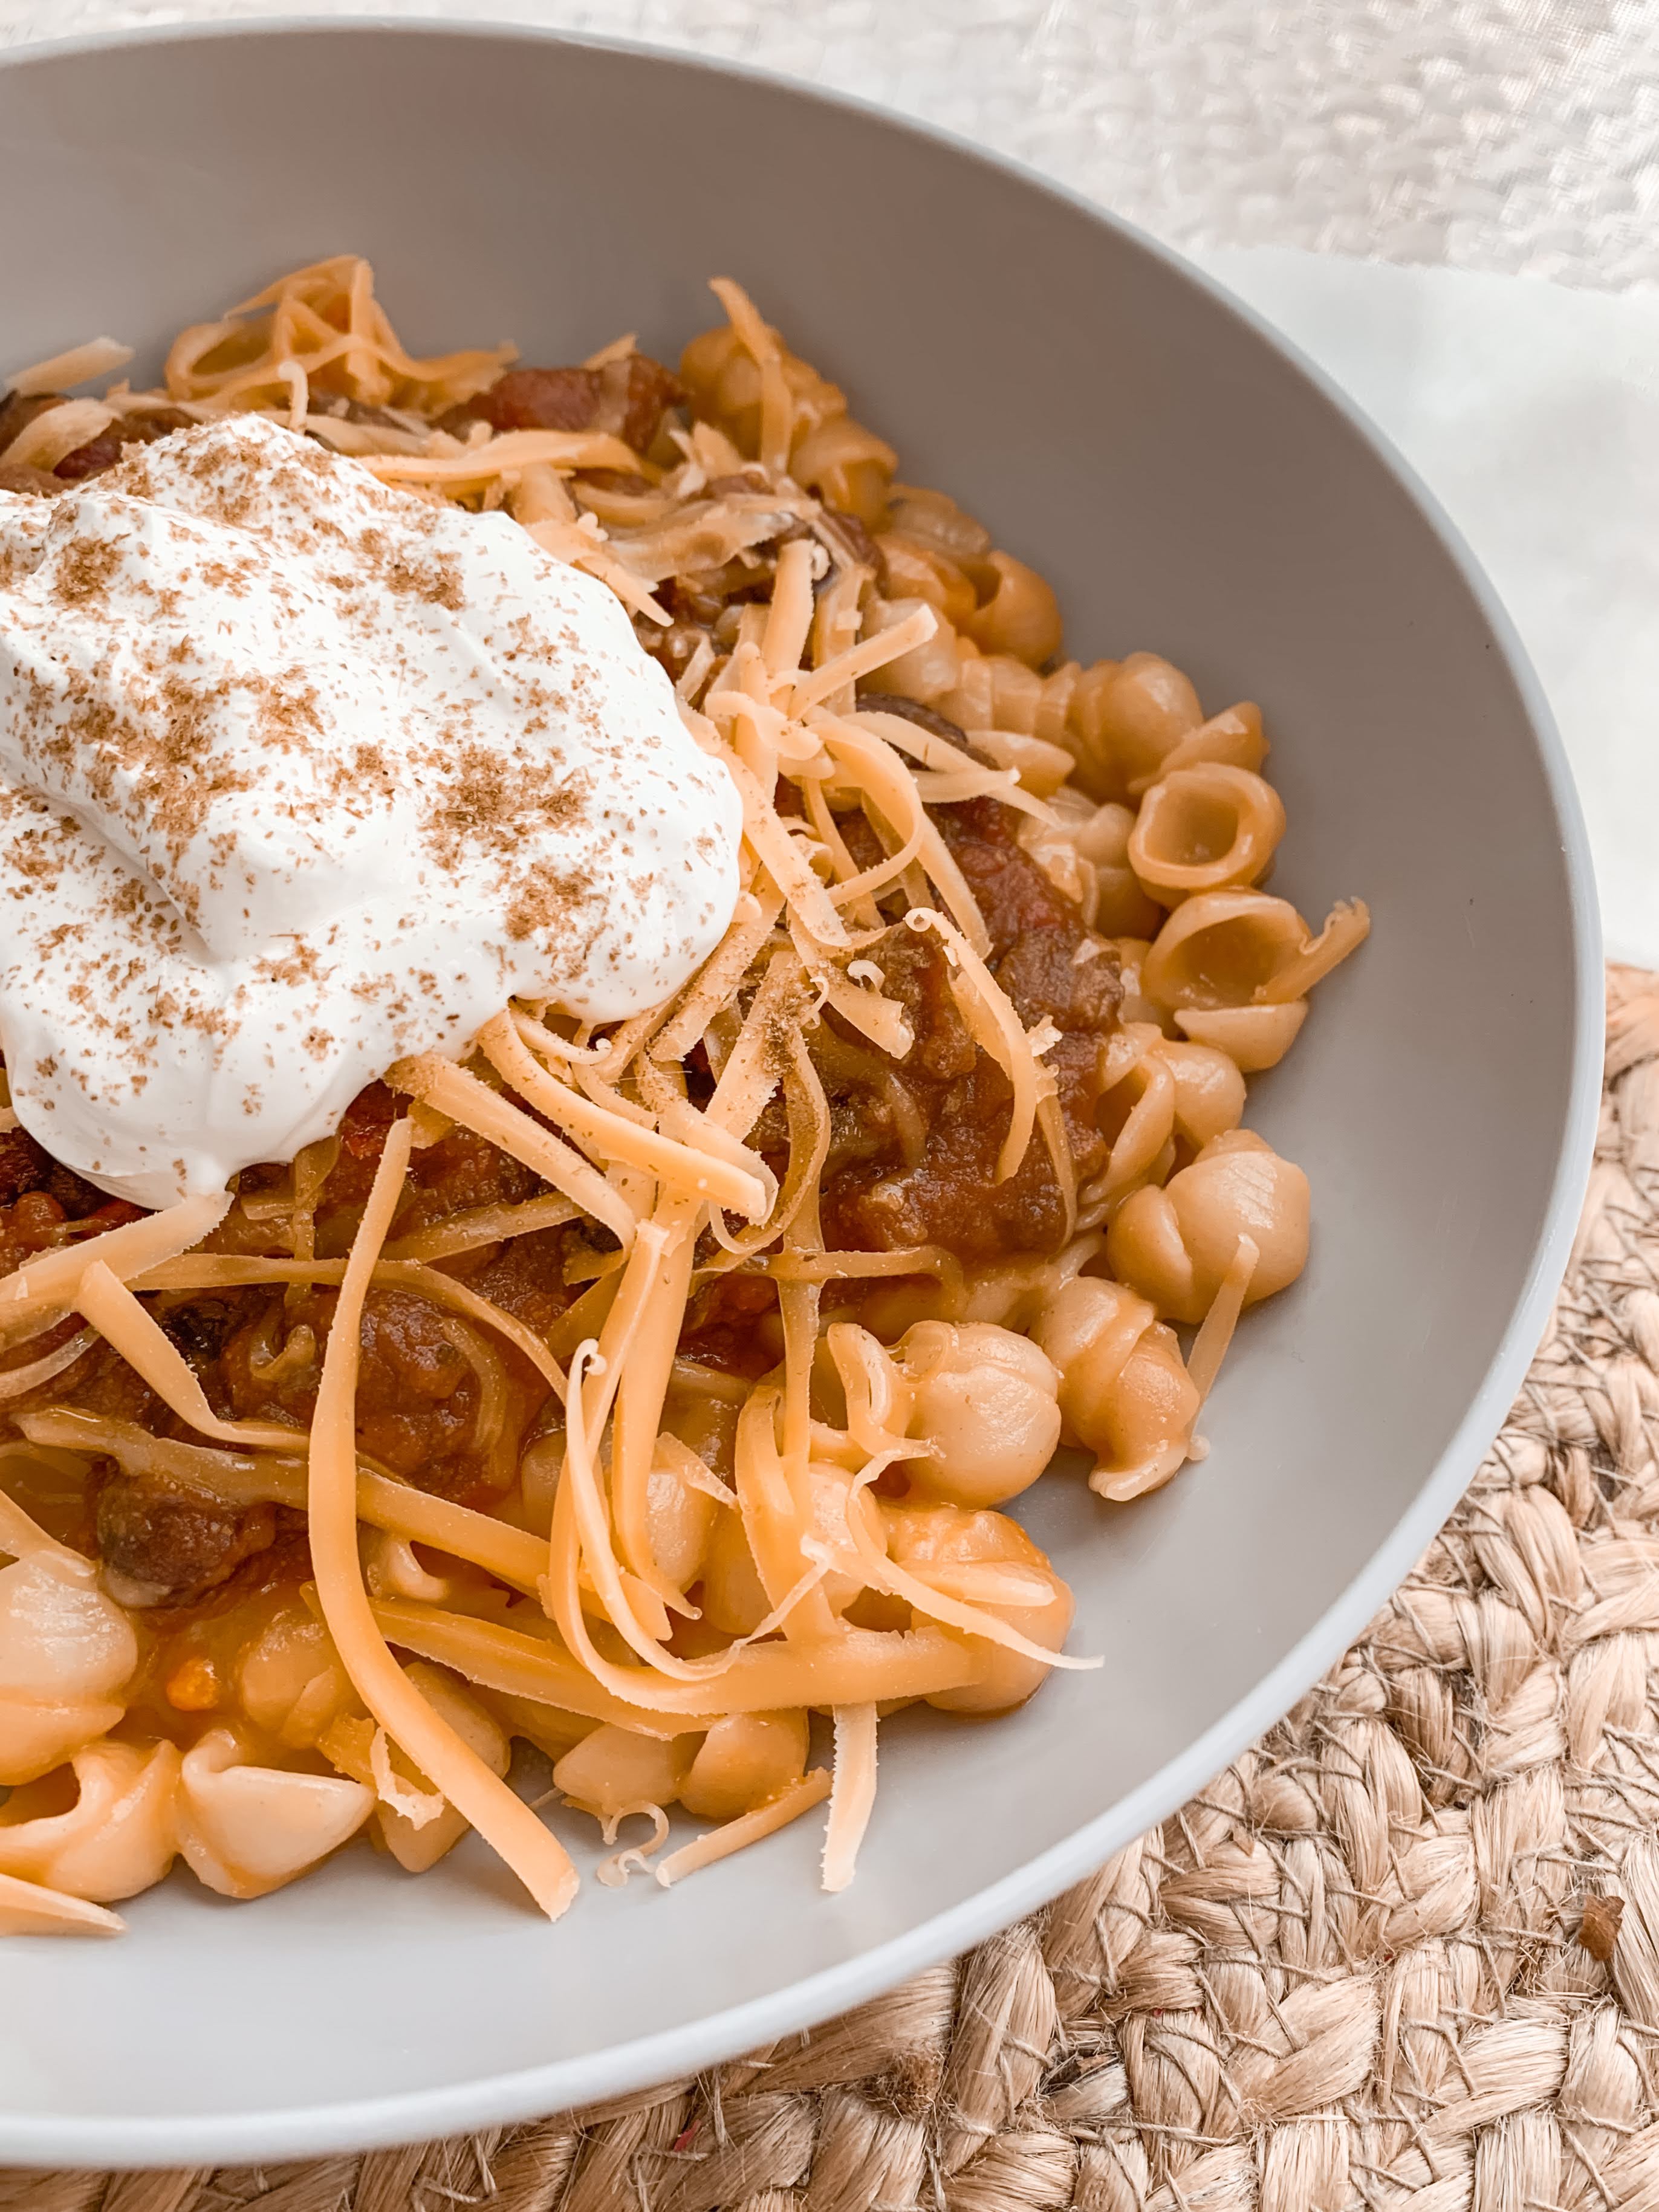
Last year, when I was in the grocery check-out, a woman said she was making a pumpkin chili recipe. After going on about how much of a difference smoked paprika made over regular paprika, she explained how she prepared it and served it in a giant carved out pumpkin on her dining room table when her family came over for Thanksgiving. After hearing her talk so highly of this special recipe, I decided that I was going to make it myself. As she had stated so importantly, the two key ingredients are a can of pumpkin pureé and smoked paprika.
INSTRUCTIONS
First, prepare all your vegetables by chopping up your bell pepper and onion.
Drain all your beans and pour them into your crockpot along with the chopped vegetables, crushed red tomatoes, pumpkin pureé, vegetable stock and stir until all is combined.
Turn on your crockpot at a low temperature then add all your seasonings and stir, again, until all of it is combined.
If you choose to add meat, add your meat after it’s been browned thoroughly.
Leave to cook, stirring occasionally, for four hours.
That’s it! Very simple and very yummy!
INGREDIENTS
1 can of pumpkin pureé
1 can of crushed red tomatoes
1 can of black beans
1 can of dark red kidney beans
1 can of cannellini beans
1 chopped green bell pepper
half chopped onion
2 cups vegetable stock
1 tsp garlic powder
1 tsp smoked paprika
1 tbsp cumin
1/2 tsp salt
1/2 tsp black pepper
Optional:
1 lb ground turkey To make this meal with meat, brown ground turkey in a large pan on the stove top with olive oil and season it with garlic powder, cumin, smoked paprika, salt, and pepper. Eyeball it.
1 dollop of sour cream for topping
Shredded cheddar cheese also for topping
1 box of store bought mac and cheese This is a less healthy way to eat chili, but honestly, chili mac is one of my favorite things and I just can’t help myself. Boxed is easy and the baby loves it LOL
Enjoy your perfect, easy fall meal! We love this on a chilly (get it?) day! x Abigail
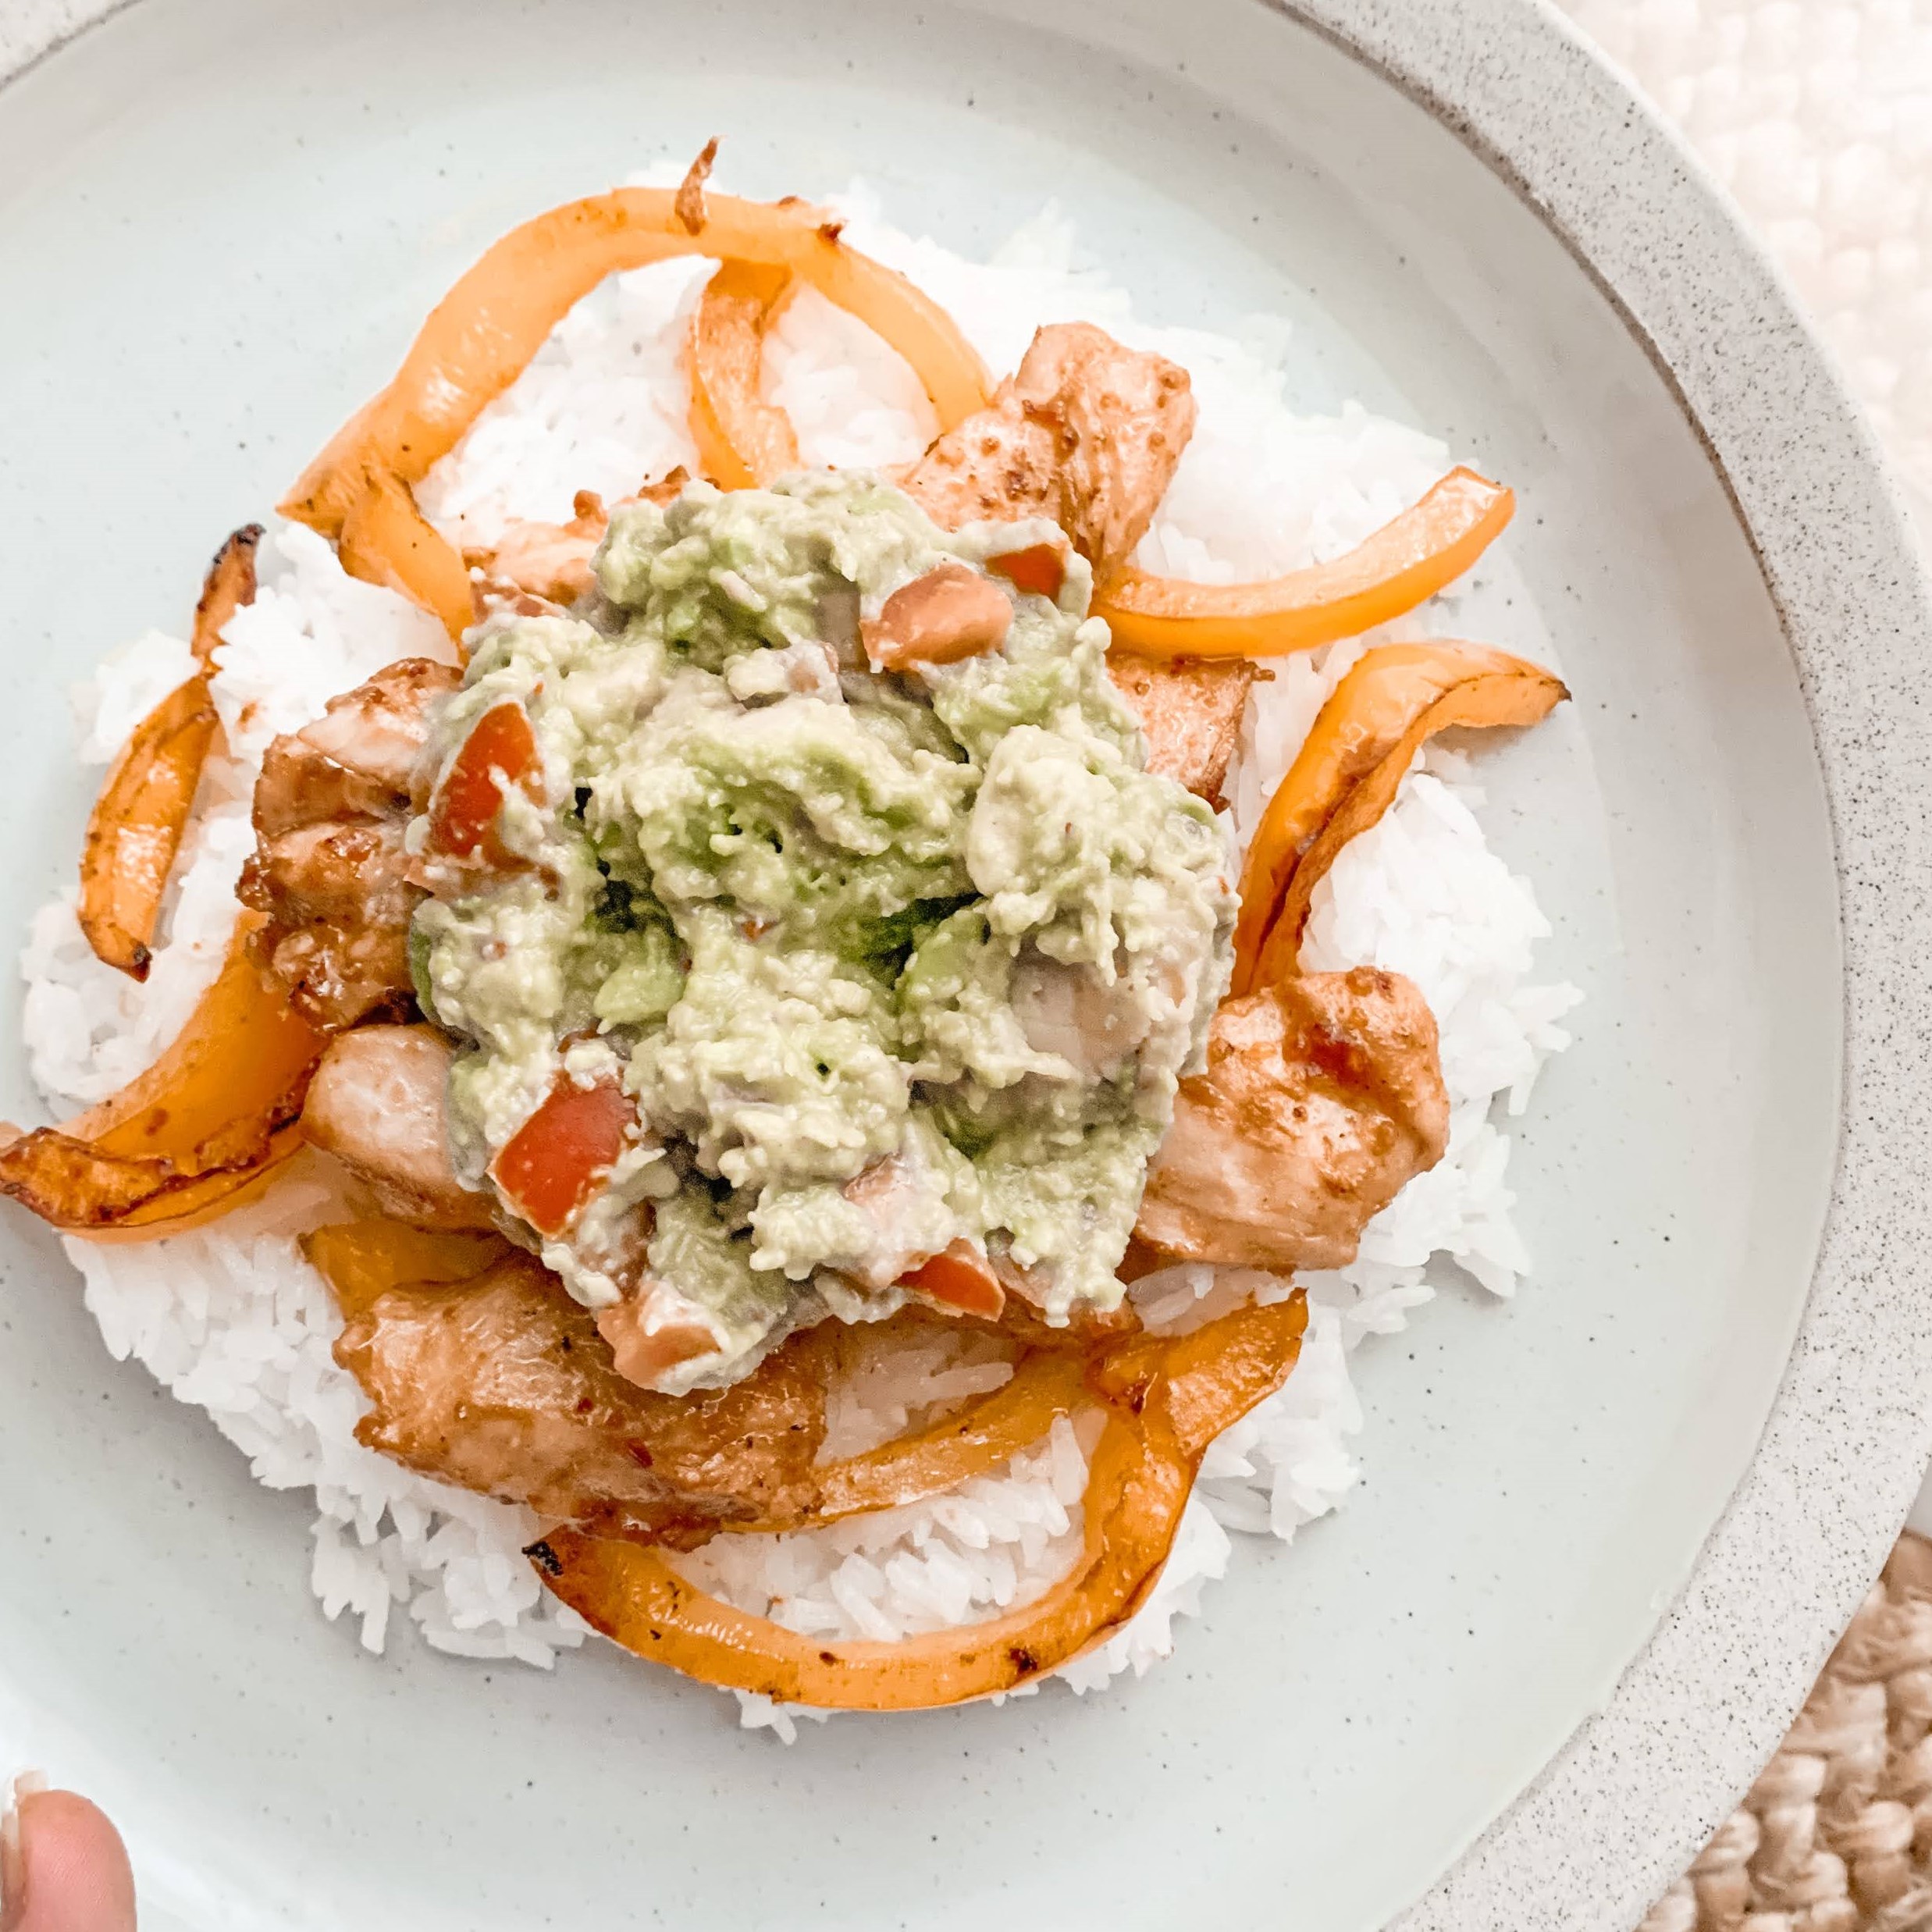
This is my all-time favorite chicken dinner we have at our house. I completely made it up one night a while back because we needed to use the avocadoes we had before they rotted and I had pulled chicken out for dinner. Originally, I just stuffed chicken breasts with guacamole and peppers, but as time went on we loved the skillet cooked chicken best. I honestly do not make this as much as I should, but plan to from now on. It has that perfect savory taste you’re always craving and is very healthy with tons of vegetables and lean chicken. I always serve it over white rice because that just makes sense to me, but any rice or stach of your liking would work. I imagine roasted potatoes would be lovely.
INSTRUCTIONS:
In a medium sized skillet, heat olive oil on a medium high temperature.
While your skillet is heating up, cut your chicken breasts into cubes then place them in the skillet and sprinkle with salt and pepper. Allow to cook on one side for about 5 minutes.
As your chicken cooks, cut up your bell pepper and mince your garlic, then set aside.
Return to your pan and flip the chicken, then salt and pepper again. Allow to cook for another 5 minutes and then add 1 packet of powdered gaucamole seasoning, your minced garlic, and squeeze 1 lime into the pan.
While your chicken cooks on the other side, grab your avocadoes and peel and add to a mixing bowl to start your guacamole.
Dice your tomato into very small pieces.
Mash the avocadoes and add 1 lime, your diced tomato, and the other packet of guacamole seasoning. Mix well.
Stir your chicken around until browned and crispy around the edges, then remove and place on a paper napkin and set aside.
In the same skillet, throw in your bell pepper slices and cook until slightly browned and soft. Allow to stay a little crunchy, you don’t want them mushy.
As soon as your guacamole is made, chicken is cooked, and peppers are roastd, you are ready to assemble and enjoy!
INGREDIENTS:
2 large chicken breasts
2 ripened avocadoes
2 limes
1 roma tomato
1 yellow bell pepper
1 garlic clove
2 packets of guacamole seasoning
2 tbsp olive oil
salt
pepper
I can’t wait to hear who tries this and how you liked it! I’m also curious to know if anyone has doe this or seen a recipe similar to this one out there because I totally made this up in a moment of panic and it instantly became a family favorite!
I found a girl on TikTok who posts many vegan/vegetarian snack and meal recipes, this being one of them. I love sweet potatos, my baby loves sweet potatos, it’s an all around win-win.
There’s no better way to start your morning than with a bunch of superfoods and a big mug of black coffee. I feel better when I eat clean and when I start the day off strong in my diet. For all my plant based eaters out there, this is the breakfast recipe for you because it’s about to include all your favorite things and the egg can be removed for my vegan friends because this breakfast is JUST as good without it!
INSTRUCTIONS:
Wash 1 sweet potato and stick it with a fork multipe times all the way around.
Wrap the potato in a damp paper towel and microwave for 6 minutes.
While your potato bakes, mash an avocado and mix it with juice from half a lime, garlic powder, italian seasoning, salt, & pepper (chia seeds or Everything but the Bagel seasoning optional).
When you sweet potato has finished baking, remove from microwave and put in a mixing bowl. Add flour until it becomes a doughy consistency.
Heat a pan on medium heat and place your dough to fry for about 4-5 minutes on each side.
Fry an egg to your liking.
Spread avocado mix onto your torilla and place the egg on top!
WHAT YOU’LL NEED:
1 sweet potato
1 avocado
1 egg
1 lime
1 tsp garlic powder
1/2 tsp italian seasoning
salt
pepper
flour
Optional: 1 tsp chia seeds or Everything but the Bagel seasoning sprinkled to your liking!
When I was in college, I had a roommate that made our house banana bread all the time. The kitchen was always filled with it for us to grab in the morning on the way to class or if we needed something sweet to munch on as a late night snack. I think the story goes that she would always buy bananas and then not eat them fast enough so she needed a way to not waste them once they got riper than she was willing to eat them.
Thank God for Rachel. I’m not sure I would have gotten through that last semester without those muffins always available and I know the rest of the roommates would say the same. Since I am rewatching Grey’s Anatomy for, like, the 6th time, a fun comparison I can give you is calling Rachel the “Izzy” in our household with her muffins. It was amazing and I can’t help but smile. I will always think back to my time living in College Park fondly when I bake banana bread.
This specific banana bread recipe is referred to as “Copycat Starbucks Banana Bread” because the recipe apparently comes directly from Starbucks itself. I haven’t personally compared, but it’s delicious so I believe it! I hope you love it as much as my roommates and I did! My son is obsessed with it just as I expected him to be and I know this will be something I make very often from here on out.
I think I enjoy the muffin form of these much more than a loaf because it controls portions, is less mess, and is easier to store, so I would definitely recommend making muffins instead if anyone tries this recipe!
INSTRUCTIONS:
Preheat your oven to 325 degrees, 300 degree for a glass pan.
Add flour, baking soda, and salt into a medium bowl, mix, and set aside.
In your mixing bowl, add the egg, sugar, and oil together and beat until well combined.
Add the dry ingredients to the wet and continue mixing until you have a thick, dry mixture.
Next add the milk, vanilla flavoring, and mashed bananas and beat until they’re well incorporated.
Mix in your 1/2 cup walnuts and 1/4 cup cinnamon chips then pour into your loaf pan or cupcake tin.
To garnish as I did, cut a banana in half and then cut one of the halves in half again longways. Gently place on top of your loaf, in the pan before putting in the oven. (This may cause the bread to need to be baked longer so make sure if you do this to actually poke with a toothpick repeatedly to make sure it’s baked all the way through.)
Bake for about 50-75 minutes depending on what pan you’ve used. Check regularly after the 50 minute mark with a fork or toothpick until it comes out of the loaf clean.
— While gathering all the things I needed to start baking, I found that bag of cinnamon chips. They are not in the Starbucks recipe, but when I saw them I couldn’t resist using them. Be careful not to put too many in your batter though because they’re really strong!
WHAT YOU”LL NEED:
2 cups flour
1 tsp baking soda
1/4 tsp salt
1 egg
1 1/8 cups white sugar
1/2 cup vegetable or canola oil
2 tbsp milk
1/2 tsp vanilla flavoring
3 well mashed bananas
Optional: 1/2 cup chopped walnuts 1/4 cup cinnamon chips 1/2 whole banana to garnish
We don’t use cow’s milk in our household so I used almond milk in place of it, which worked fine. I used a glass pan and ended up having to leave the bread in the oven for 70 minutes.
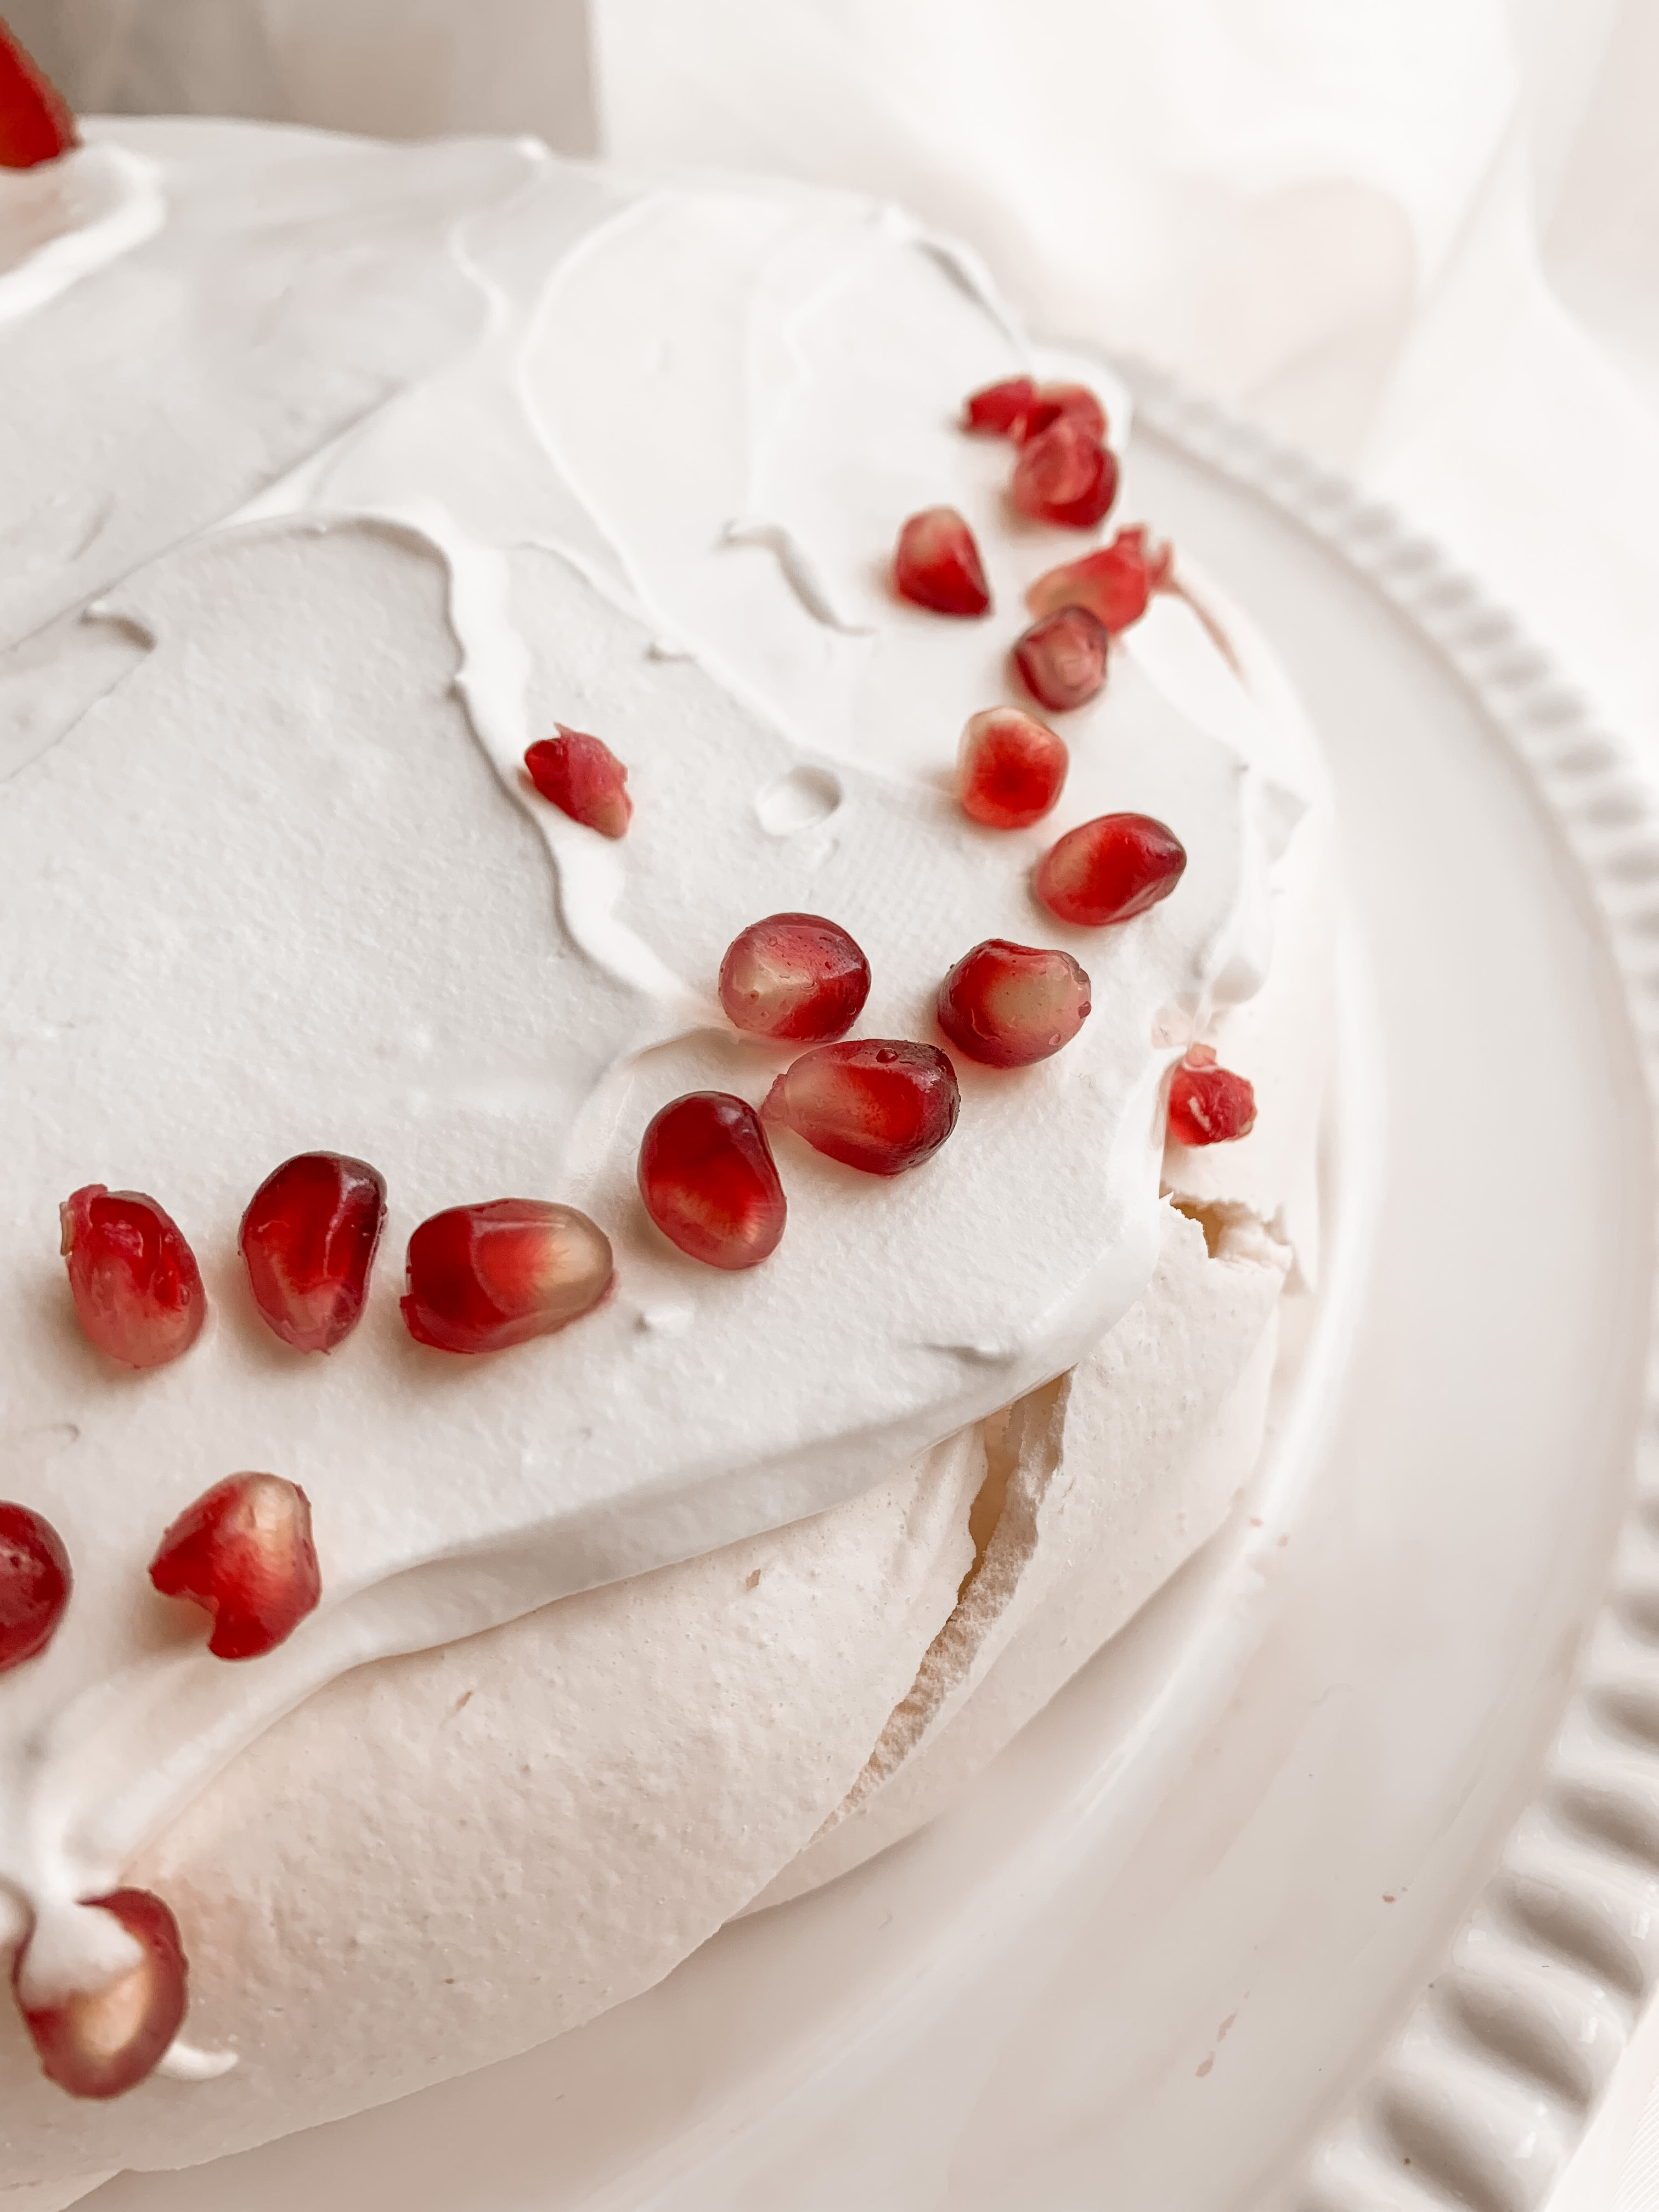
One of my very best friend’s grandmother lives in New Zealand and comes to visit her family and friends in the states a few times per year. About 4 or 5 years ago when she was here, she pulled my friend and I into the kitchen to make a special New Zealand/Australian dessert called Pavlova. Before this I had never heard of Pavlova before. Basically, for those of you who also don’t know what it is, it’s a meringue-like cake that takes anywhere between 12 hours to make in order to allow it to completely harden properly.
I wrote each step down carefully as we went through them so I would always have it and so that Madison and I would be able to make it even when her grandmother ventured back to her side of the world. Truthfully, I have only made it once or twice since we all made it together and I wish I made it more often because it’s extremely pretty and undeniably delicious. Anytime I mention this dessert, no one knows what it is and in my opinion, it’s quite a shame . Everyone should know how to make it even if they don’t have the patience to.
A quick history on the dessert:
Pavlova was originally designed to be a tea dessert at the Hotel Esplanade in Perth of Western Australia by a chef named Herbert Sachse. It was named after the Russian ballerina, Anne Pavlova, during a meeting where Chef Sachse remarked that it was “as light as Pavlova” (referring to her dancing) who had been a guest of the hotel during her tour of 1929. Later in 1972, Sachse reported in a magazine interview that he had sought out to improve a meringue recipe that he originally saw in Women’s Mirror Magazine in 1935.
INSTRUCTIONS:
Preheat your oven to 360 degrees.
Beat 6 egg whites in a mixer at a medium speed until firm. I would suggest seperating whites and yolks in a seperate bowl and dumping each egg white into the mixer one by one to prevent wasting eggs if the yolks break.
While beating the whites, add in your sugar 1 tbsp at a time.
When you have finished adding your sugar, add your corn starch, still mixing.
Keep the mixer on and continue beating, then add your white vinegar.
Continue to beat the mix until it becomes firm.
While the mixture continues to beat, place parchment paper on a baking sheet and draw a circle the size of a paper plate onto it with a pencil.
Smoothly spread the mixture in the shape of the circle onto the parchment paper.
Bake on 360 degrees for 5 minutes.
Turn down the oven to 260 degrees and bake for 1 hour without removing the pavlova from the oven.
When your timer has gone off after 1 hour, turn off the oven.
Leave the pavlova in the oven to harden overnight for about 12-24 hours.
DO NOT OPEN YOUR OVEN AFTER THE PAVLOVA HAS GONE IN TO BAKE. This is very important for the hardening process.
This process is quite lengthy and takes time to reach the proper consistency, so be patient and give it time before worrying that you’ve done something wrong!
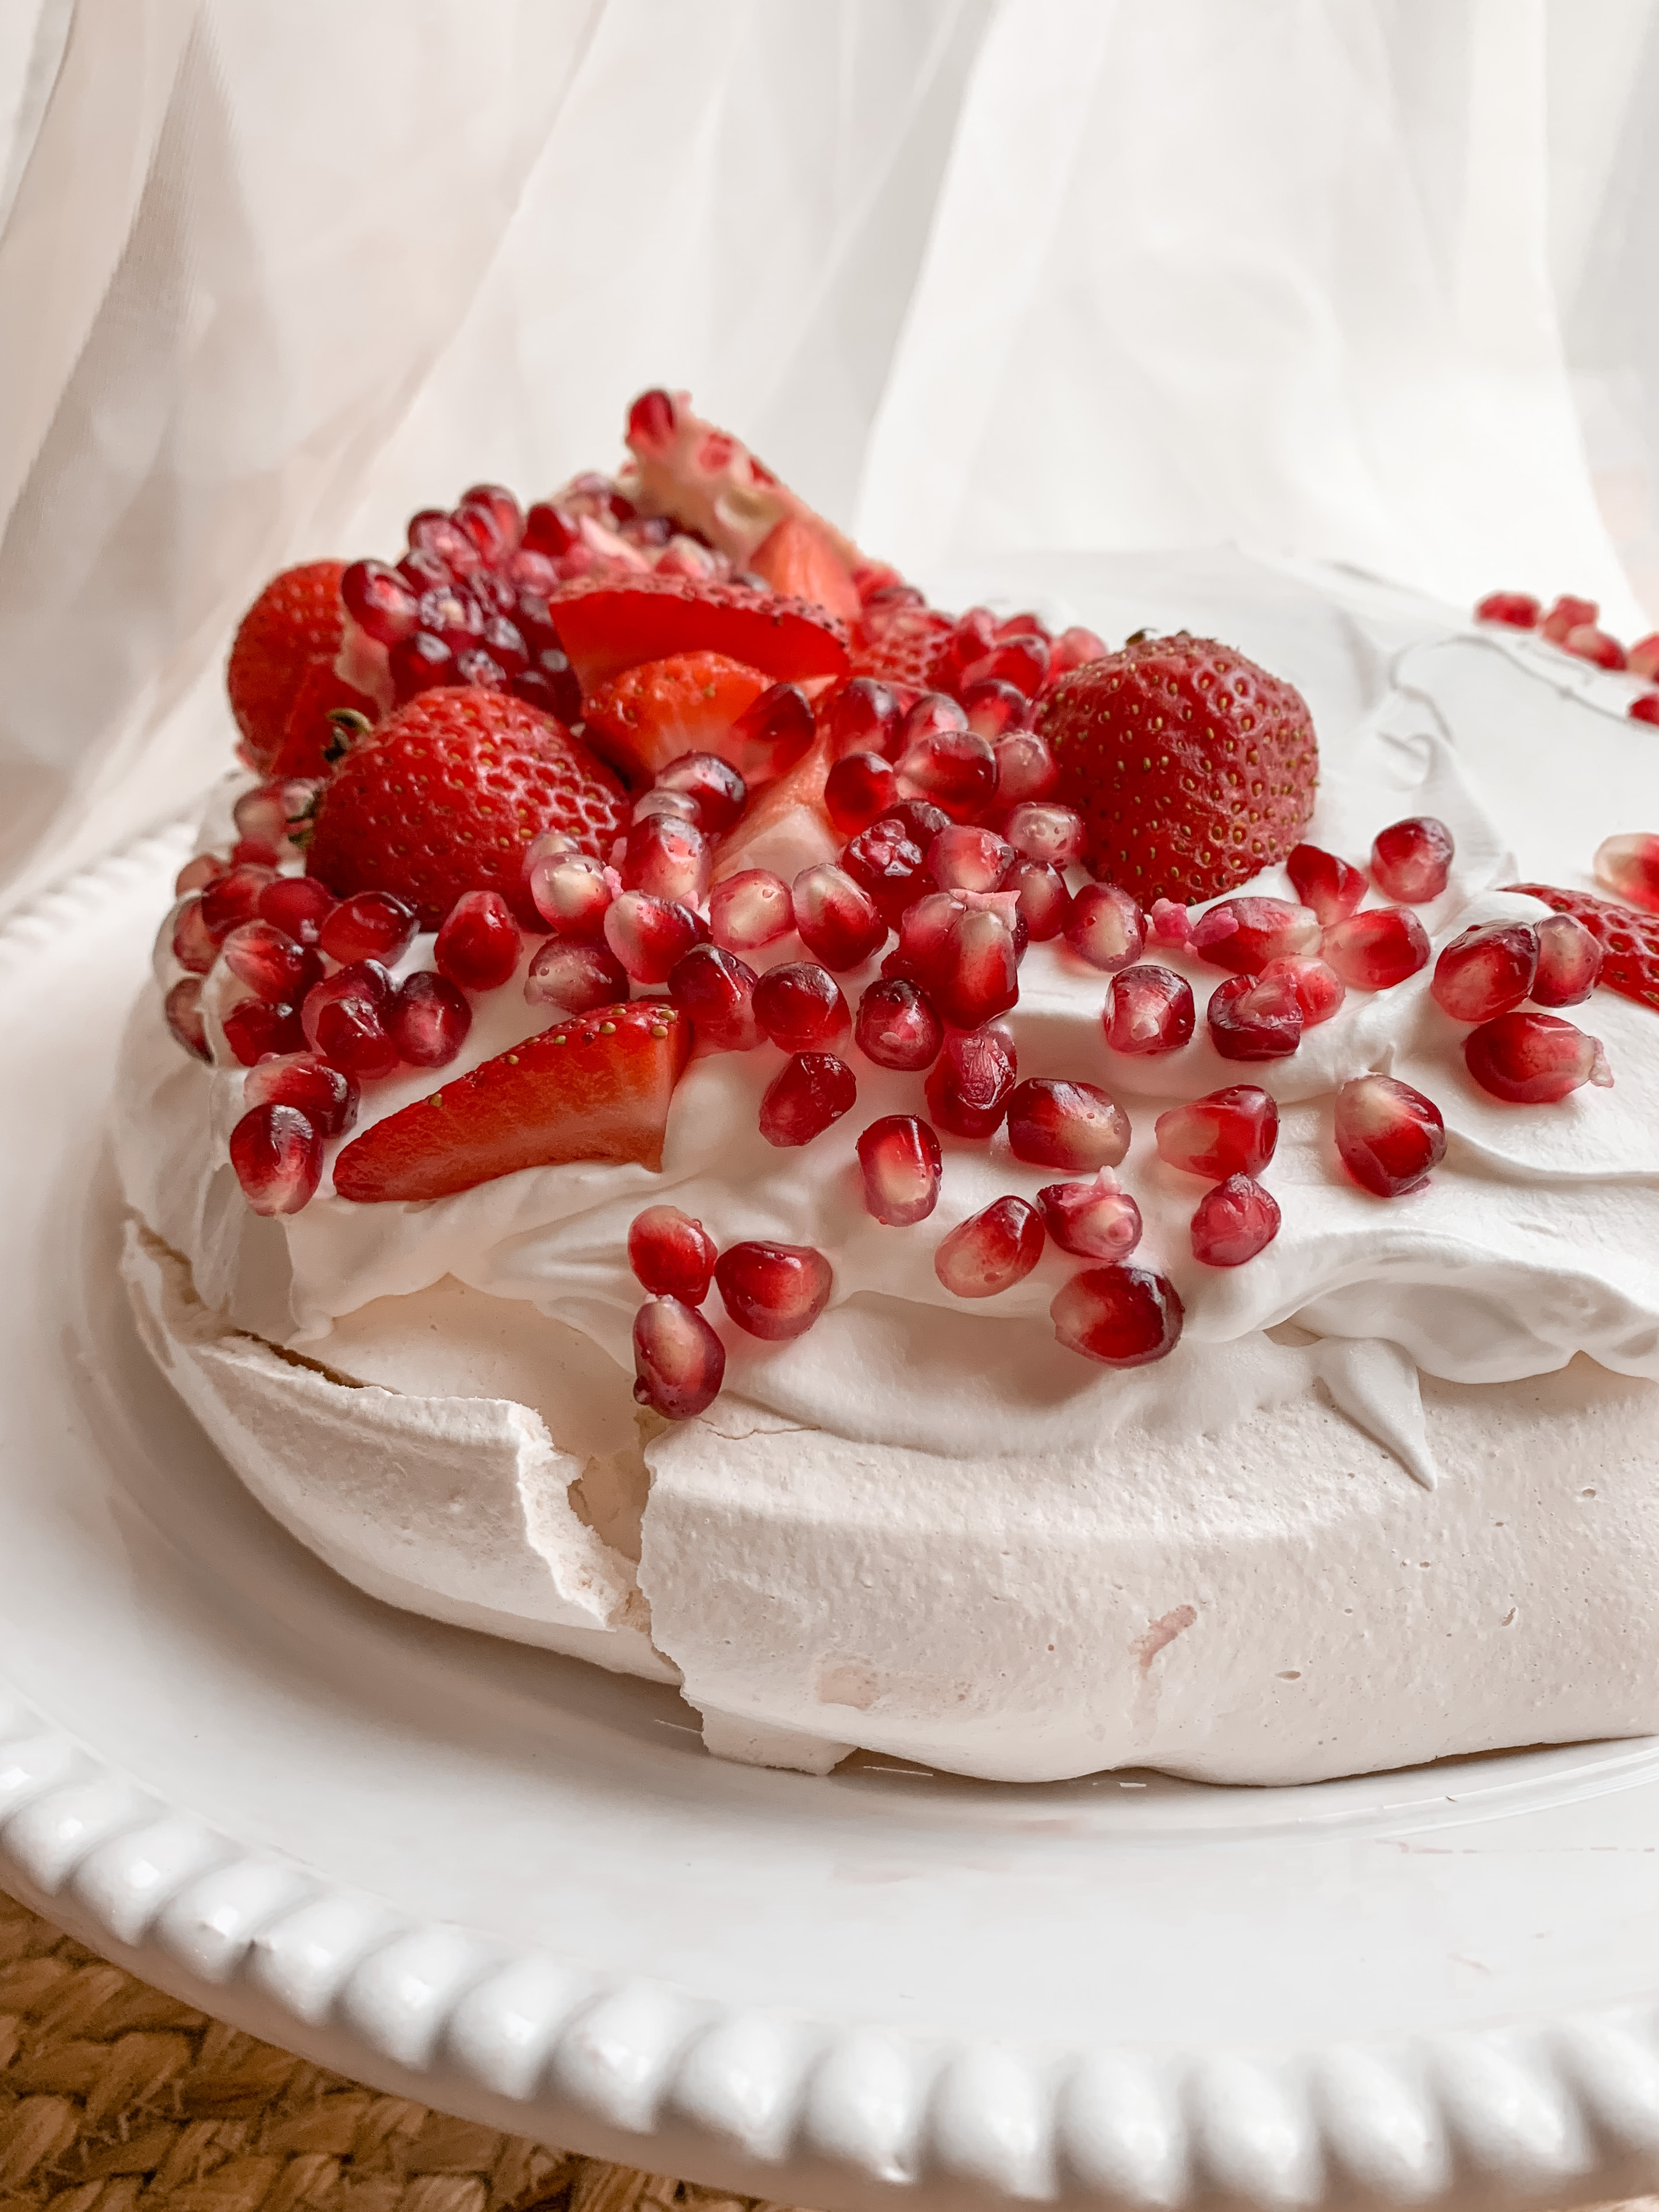
For toppings, I chose to use cool whip and fruit! We cut up a pomegranate because the grocery store rarely has them and I came across some this week! I also picked up some strawberries!
WHAT YOU’LL NEED:
6 egg whites
1 1/2 cups of white sugar
2 tsp corn starch
1 tsp white vinegar
Parchment paper
TOPPING:
1 tub of Cool Whip
6 Strawberries
1 Pomegranate
I have been wanting to make a post about this for some time now and I am so glad that I’ve been able to share this with everyone! If any of you make this wonderful dessert, please tag me on instagram or send it via direct message on there! Unfortunately my comment sections on this website doesn’t allow photos to be dropped, so Instagram is my only way to connect and see your beautiful creations!
Back in January I started working at H&R Block. During my time there, I became friends with a co-worker who is from Germany! She was born and raised there and had only moved to the states in her later years after marrying an American who had been deployed to her country during his time in the service. We added each other on facebook and she makes most of her meals from scratch, occasionally shares them online! She posted a stuffed pepper recipe that looked and sounded so delicious! I messaged her for the recipe and she kindly sent it my way.
We are a family that doesn’t eat much red meat and I try my best to stick to a pescatarian/vegetarian diet so I subsituted with ground turkey since my husband prefers it!
INSTRUCTIONS:
Mix 1 lb of ground turkey with 1 egg, half a chopped vidalia onion, breadcrumbs, garlic powder, and a pinch of the following: italian seasoning, salt, & pepper.
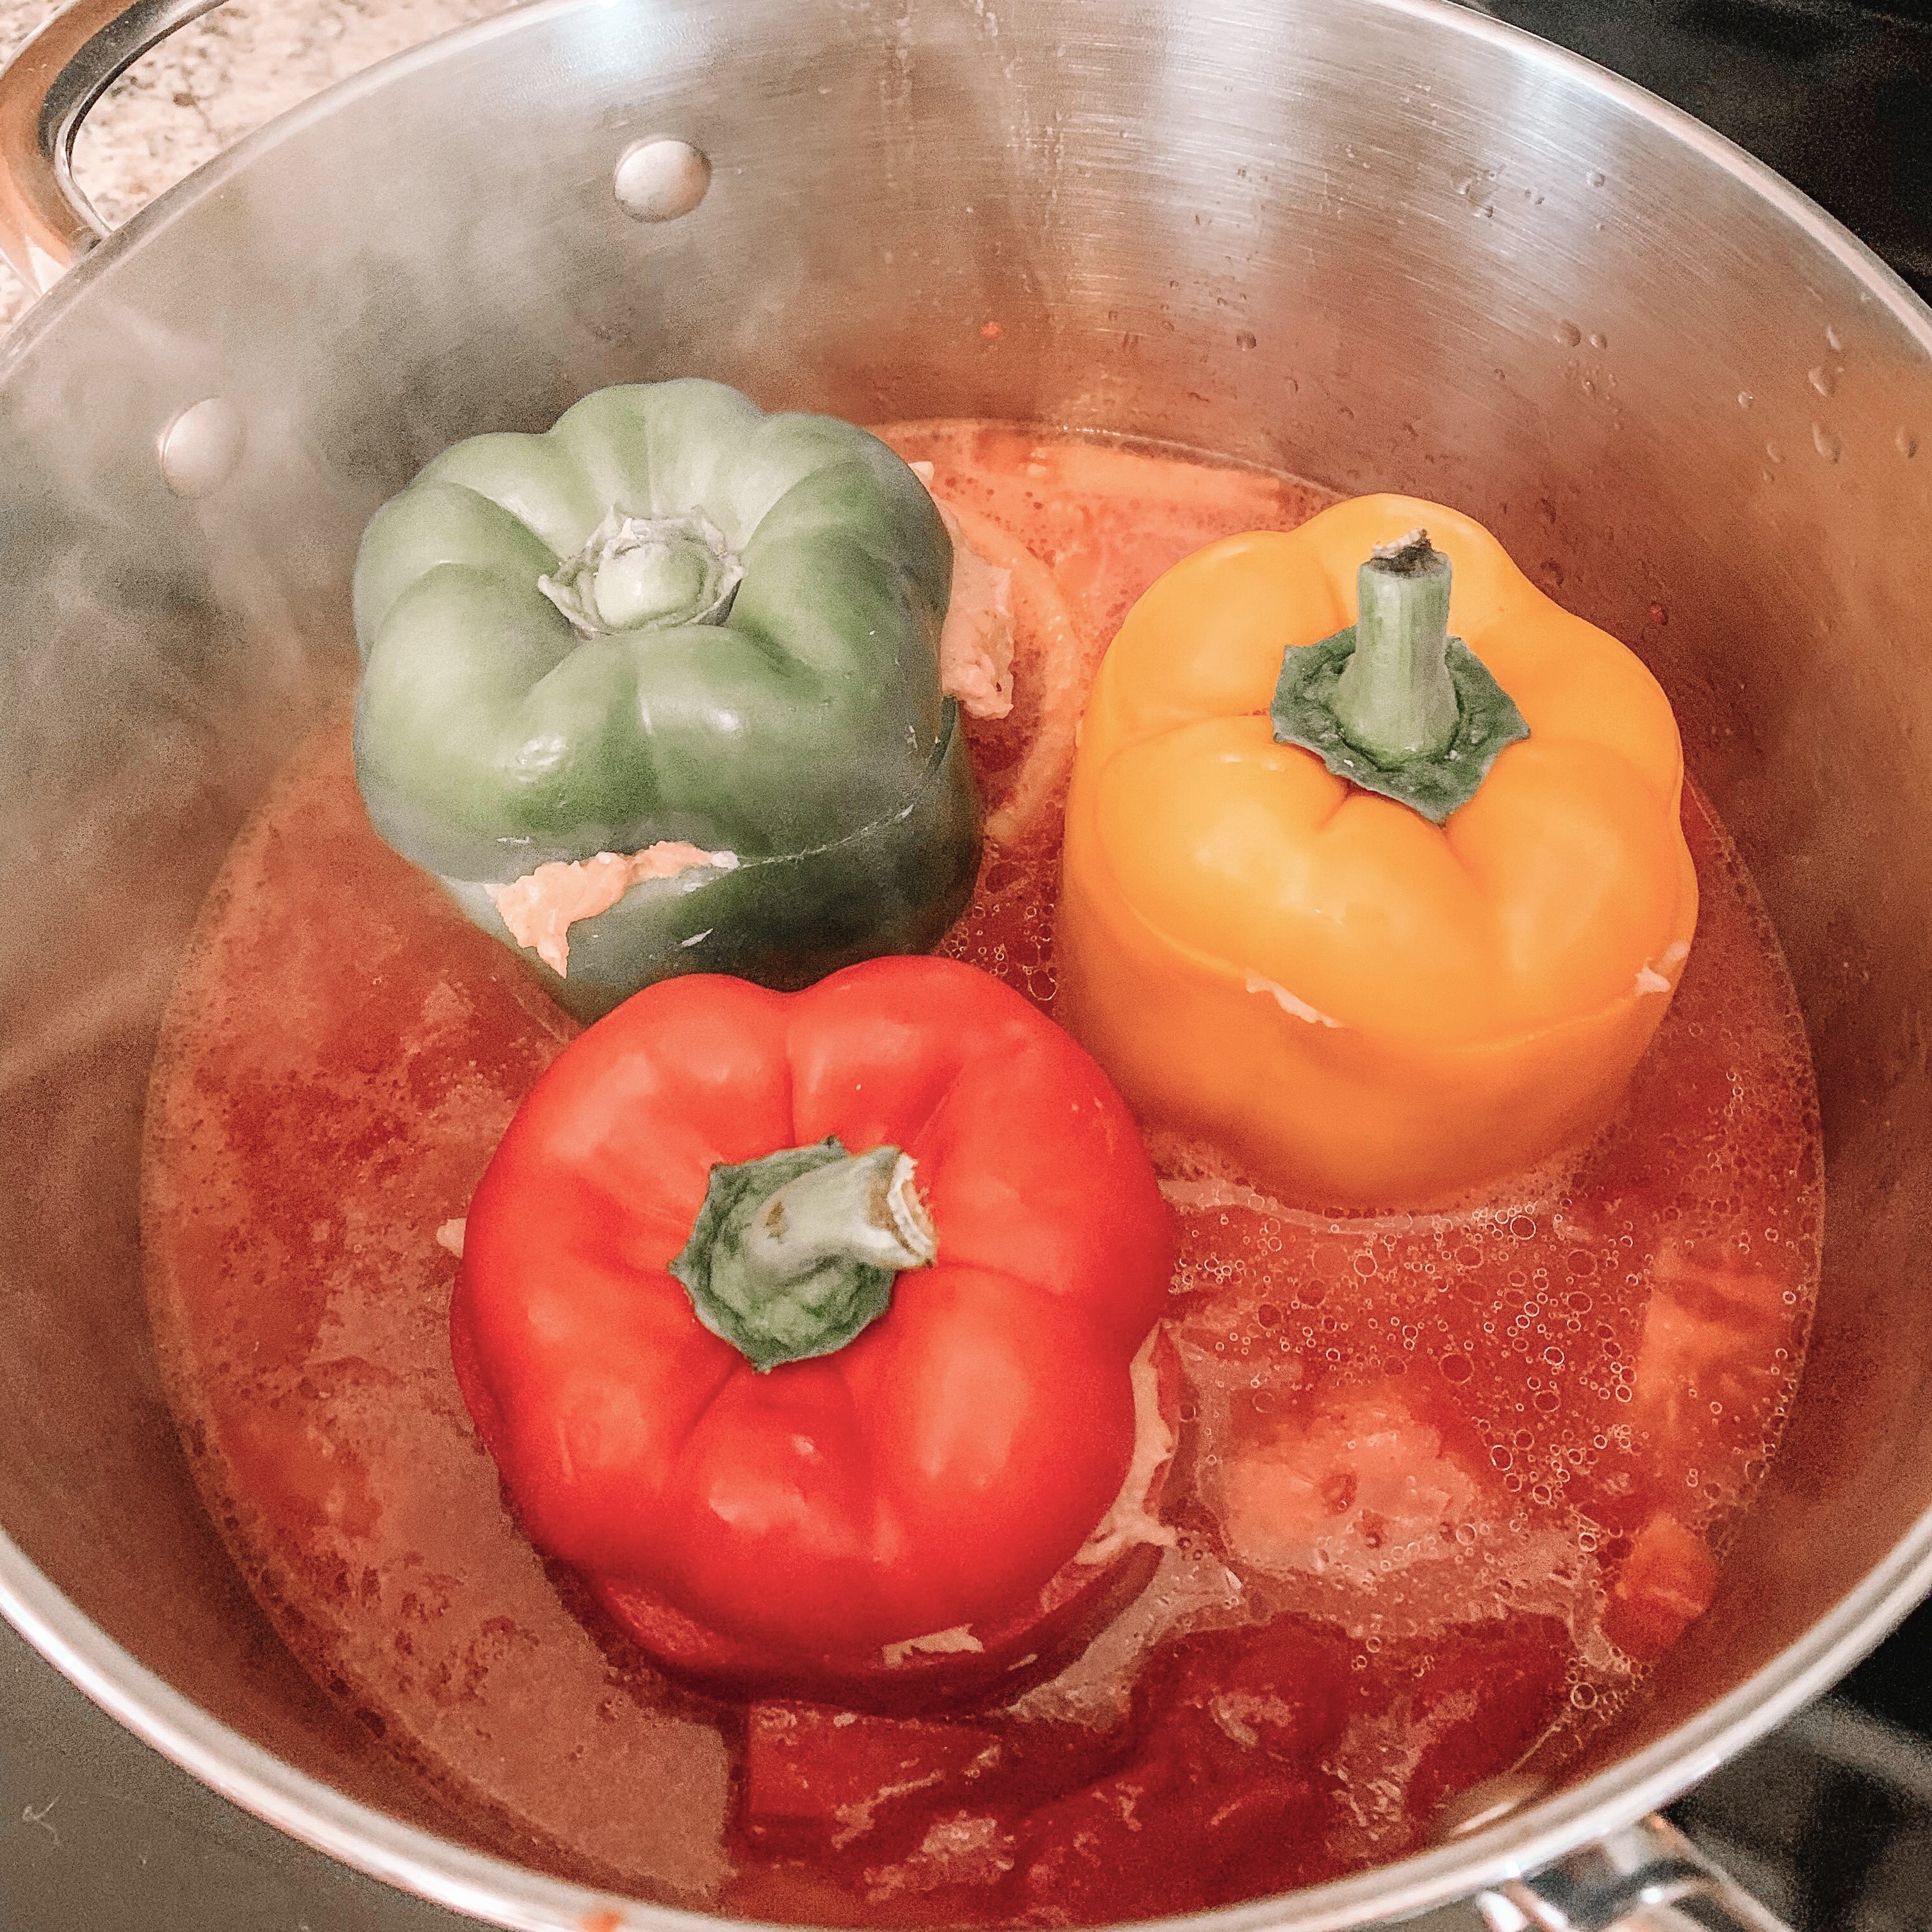
Cut the tops off of 3 bell peppers, clean them out, and fill them with the mix.
Fill a stock pot with 3/4 cup water, 1 can tomato paste, i chopped tomato, the other half of the onion, 1 cup of uncooked white rice, and then place the stuffed peppers in the pot standing upright.
Bring the pot to a boil then reduce to simmer for 40 minutes stirring occasionally to keep the rice from sticking to the bottom of the pot.


