“Touch of Pumpkin Spice” Muffins

Pumpkin Spice Lattes are back at Starbuck so you know what that means… Pumpkin everything is hitting the shelves!! Fall is FINALLY right around the bend and I’ve got a few recipes I’d love to share this season, but what better way to start off than with pumpkin muffins and bread?

I really like this recipe because it’s a nice hint of that desired pumpkin taste, but isn’t overwhelming. The small touch of pumpkin in this bread is enough to get you in the fall spirit without easily tiring you out. It’s perfect for someone a little weary of the pumpkin spice trend AND for those who are all about it, might I say she’s a happy medium!

INSTRUCTIONS

  1. Add your wet ingrdients, eggs, vanilla, pumpkin puree, sugar, and coconut oil to a medium size bowl and combine well, then set aside.
  2. In your main bowl, combine flour, baking powder, baking soda, salt, cinnamon, clove, and ginger.
  3. Add your wet ingredients to your dry and mix well.
  4. Grease your pans well, then bake at 325 degrees for about 25 minutes for muffins or 45 for loaves. Be sure not to overbake in order to prevent your bread from drying out.
  5. Top with lite powdered sugar.
  6. Allow time to cool before removing from pans.

INGREDIENTS

3 cups all-purpose flour
2 cups granulated sugar
1 cup coconut oil (or canola/vegetable oil)
2 cups (16 oz) pumpkin puree
3 large eggs
2 tsp vanilla extract
2 tsp baking powder
1 tsp baking soda
1 tsp salt
2 1/4 tsp cinnamon
1/4 tsp ground clove
1/4 tsp ginger

OPTIONAL

  1. 2 tsp pumpkin pie spice if you have it in place of the extra 1/4 tsp cinnamon, 1/4 tsp grounf clove, and 1/4 ginger.
  2. Lite touch of powdered sugar as garnish.

Thanks for checking out my recipes! It’s been a while since I’ve posted here!
xo Abigail @abbvocado

Homemade Dried Orange Garland

I made dried orange ornaments last year when I first heard about dried oranges. They definitely turned out cute, but not as cute as this year’s. This year, I was able to really nail down the perfect timing and methods for each step to a perfect garland and I am so excited to share it with you all! Before you begin this process, know that it is very lengthy and you should plan a whole afternoon to dry your oranges properly. The process is a little tricky if you have never done it before, but I hope to lead you through it in a way where you don’t burn too many to end up with an extremely sticky mess.

The garland I made was about twelve feet long with each orange slice spaced about 4-5 inches from the other. The twelve foot garland is long enough to zig-zag across your tree four times. If you need to decorate the backside of your tree I would recommend doubling this length and the amount of oranges used! Please note: about two baking sheets fit in an oven and about four sliced orange will fit on them. You will need to repeat this process either immediately after the first two sheets finish baking, or find another day to dry the other four oranges.

“Excuse my messy hair, we were having a chill day at home!”

MATERIALS:

  1. 8 large oranges
  2. 2 cutting boards
  3. 1 roll of paper towls
  4. Parchment paper
  5. Baking sheets
  6. 13 Ft of twine
  7. A sharp chef’s knife
  8. 1 pair of tongs

INSTRUCTIONS:

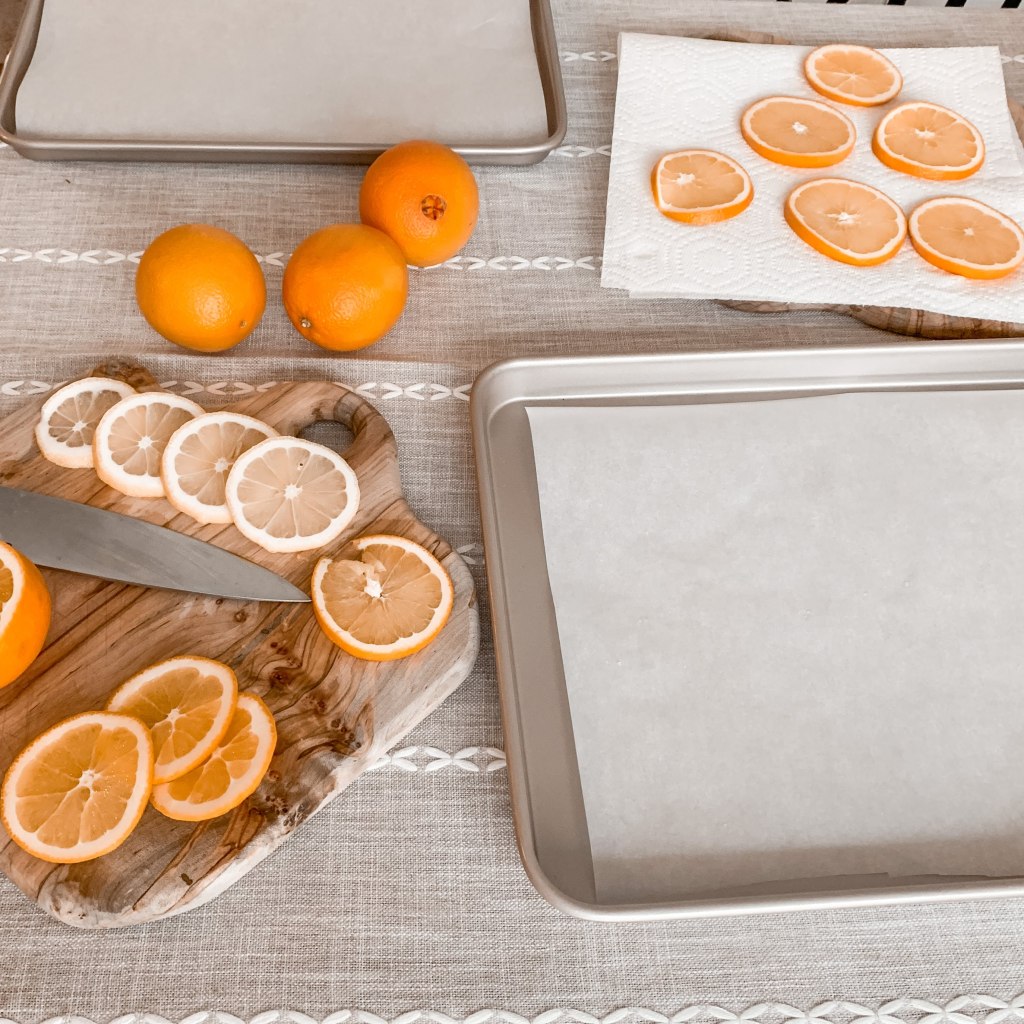
In this photo, you can see lemon slices as well. I had half a lemon leftover from a meal that was going to go bad, so I threw it on the tray to dry for fun!
  1. Preheat your oven to 200 degrees Fahrenheit and then on one cutting board, begin slicing your oranges. When slicing, make sure that you’re cutting them about 1/4 inches thick that way they don’t burn during baking but are still thin enough to dry correctly.
  2. On your second cutting board, lay out paper towels, then lay your orange slices on them and use another towel to blot the oranges to rid them of excess juice. This will help speed up the drying time.
  3. Over on your baking sheets, lay out parchment paper, then place your blotted orange slices on the sheets. The parchment paper is VERY important so your oranges don’t stick to the pan. They’re sticky from their natural juices so it could happen very easily.
  4. When your oven has reached its set temperature, slide your trays into the oven and set a timer for 1 hour. When your time goes off, remove both trays from the oven, grab your tongs, and flip the oranges over. With a new paper towel, blot the oranges to rid of more juices, then place the trays back in the oven. Repeat this process two more times. After flipping for the third time, place the oranges in the oven for only 30 more minutes, then remove from the oven and place on paper towels or a drying rack to cool.
  5. Once your oranges are cooled, grab your twine and string your oranges spreading them about 4-5 inches apart. I use a pair of scissors to poke two holes through the orange slices, but you can use other things like knitting needles or chopsticks, etc.
  6. Once all your oranges are strung, tie two big loops at each end of the twine as a way to attach the garland to your Christmas tree or wherever else you plan to hang it.

Thanks so much for reading through this tutorial! Having oranges in your home during the holidays is so fun and beautiful. I think it really makes things feel festive! It can be a bit tricky when you first try to dry them at home so I hope this helped make things a little easier!

x Abigail

Classic Gingerbread Cookie Recipe

Every year at Christmas time, I invite over my closet girlfriends for a cookie day. We mix, we roll, we bake, and we decorate and really just have tons of fun. We find one or two fun and creative festive cookie recipes in advance, but the one we always make every year is gingerbread men. It’s a fun little tradition that my best friend and I started about 4 Christmases ago and it’s something we look forward to all year round. Gingerbread is not everyone’s cup of tea, but you can make them into ornaments or garlands to decorate your home if that’s the case! They smell very delicious and are always SUPER cute.

This batch makes so many cookies that even when there’s 5 people baking, there is enough for everyone to take home an equal abundance!

INSTRUCTIONS:

  1. In a medium bowl, whisk together all your dry ingredients, which includes your flour, baking powder, baking soda, salt, ginger, cinnamon, and cloves, until well combined. Then set aside.
  2. In your main, large bowl, beat your butter and brown sugar until well blended, then add the vanilla extract and molasses. Continue to beat while slowly adding your dry mixture 1 cup at a time until everything is smooth.
  3. With your hands, gather your dough into a ball. Split the dough into two parts and cover both with cling wrap.
  4. Place your wrapped dough into the refrigerator for up to 4 days, but no less than a few hours.

When ready to bake:

  1. Preheat your oven to 375 degrees. Most recipes will tell you to line your baking pans with parchment paper, but my pans are nonstick and I have never had any issues removing my cookies from them without it. However, if you feel you need parchment paper, this is your time to line your baking sheets.
  2. Remove your dough from the refrigerator and allow to start warming up to room temperature while you prep your counter, cutting board, or smooth dish rag. To do this, grab your flour and sprinkle it all over. (It will be messy. Baking is messy!) Rub your rolling pin with flour as well. This will help prevent the dough from sticking to your tools and flat surface.
  3. Unwrap your dough and knead it around in your hands to soften it up if it’s not yet room temperature, then place in your workspace.
  4. Take your pin roller and begin rolling your dough flat until it is about 2-3cm in thickness. You don’t want to roll it any thinner or it will burn during baking. If you are still having trouble with your dough sticking to the roller, sprinkle flour on top of your dough before continuing to roll. Grab your cookie cutters, cut, and bake!
  5. Bake one sheet of cookies at a time for approximately 6-7 minutes.

I find the BEST tool to remove cookies from sheets is a metal spatula. I no longer have a metal one, but my silicone one did a fine job.

Cream Cheese Icing:

  1. Throw all your ingredients into the bowl and blend with a hand mixer until smooth! (Yes, it’s THAT easy!)

INGREDIENTS:

  1. 3 cups all-purpose flour
  2. 3/4 cup brown sugar
  3. 6 tablespoons softened unsalted butter
  4. 1 large egg (or 2 small eggs)
  5. 1/2 cup molasses
  6. 2 teaspoons vanilla extract
  7. 1 1/2 teaspoons baking powder
  8. 3/4 teaspoons baking soda
  9. 1/4 teaspoon salt
  10. 1 tablespoon ground ginger
  11. 1 1/2 teaspoons ground cinnamon
  12. 1/4 teaspoon ground cloves

Cream Cheese Icing:

  1. 4 tablespoons cream cheese
  2. 1/2 softened unsalted butter
  3. 2 1/2 cups powdered sugar
  4. 1/2 cup heavy whipping cream
  5. 1 teaspoon vanilla extract

I would definitely recommend using a Kitchen Aid stand mixer for this dough because it’s very thick, but a hand mixer or stirring by hand can work as well, just will take a little more time and a lot of muscle! I have the one linked in the color ‘toffee’ and they have endless ones to choose from. These are the kitchen cooking utensils I have and absolutely love!

THANK YOU FOR READING!
Tag me in your insta pics if you try this recipe!
x Abigail, @abbvocado

DIY Holiday Hats Garland

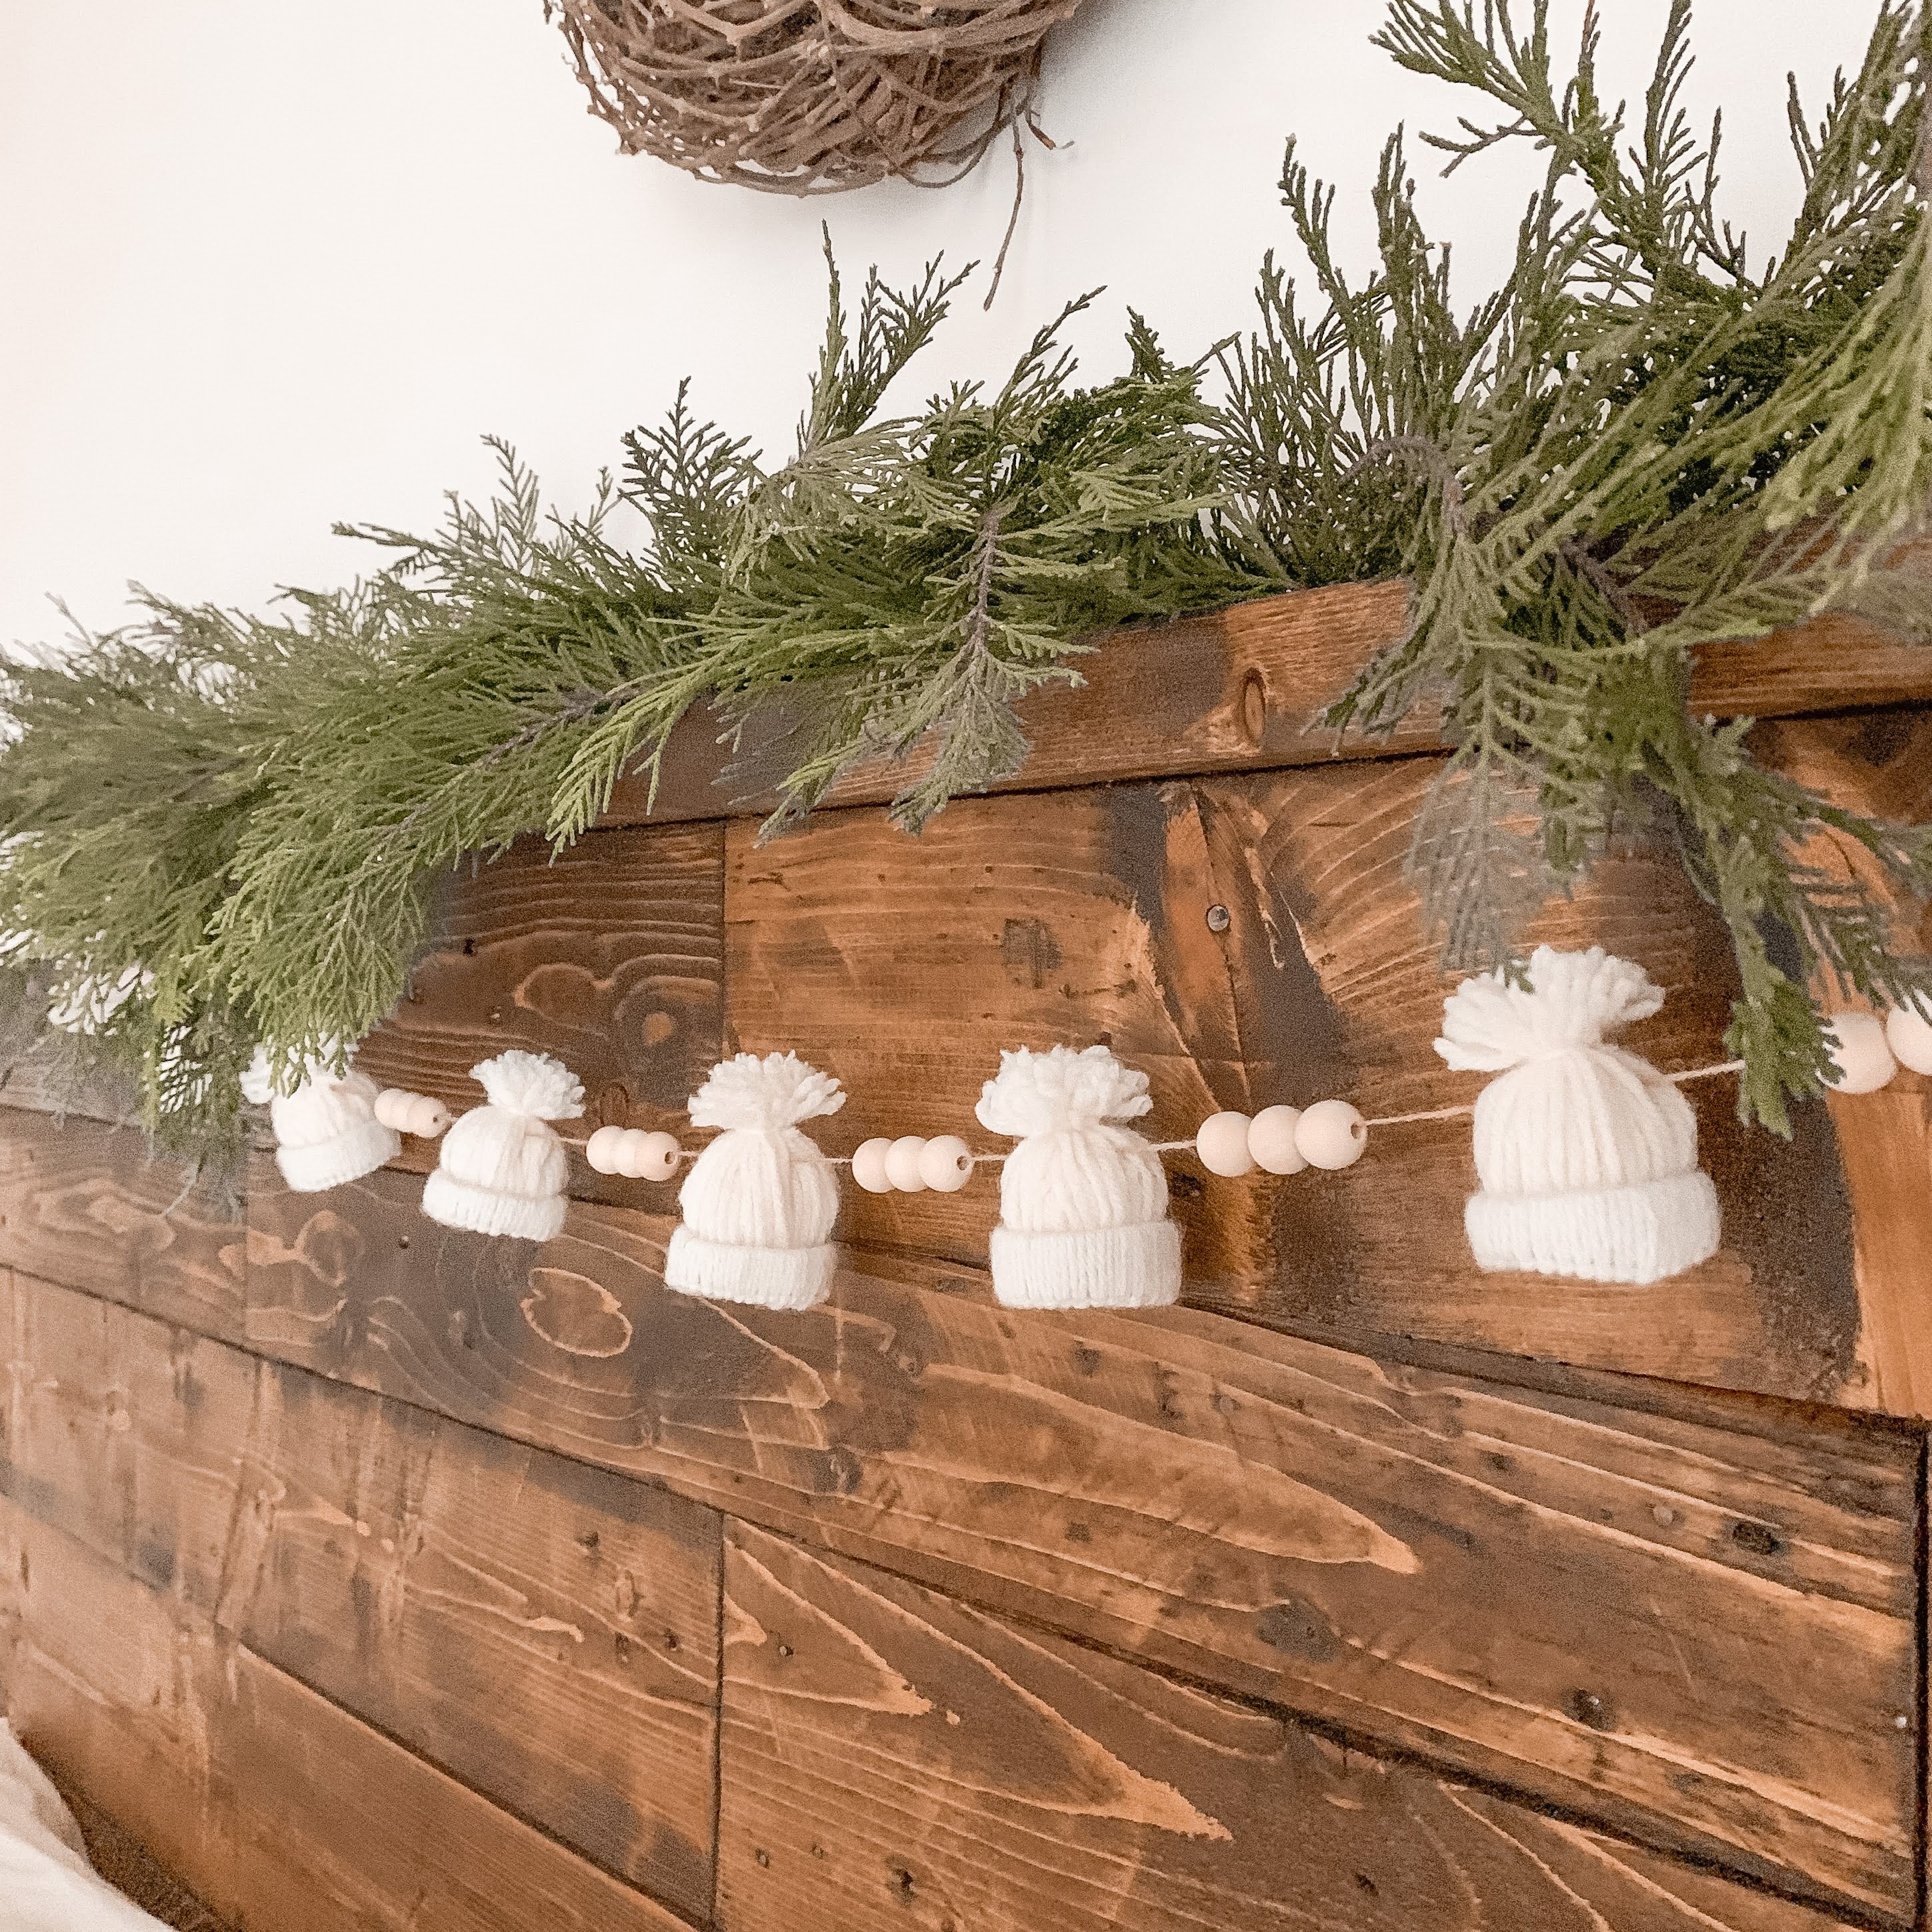
While scrolling through my Tiktok feed, I came across a video containing these absolutely adorable winter hats made of yarn! As soon as I saw them, I knew I needed to have them hanging somewhere in my home to make SOME area a little more festive. Today, I am going to show you a step by step tutorial on how I made my garland and what materials you will need if you, too want to make one!

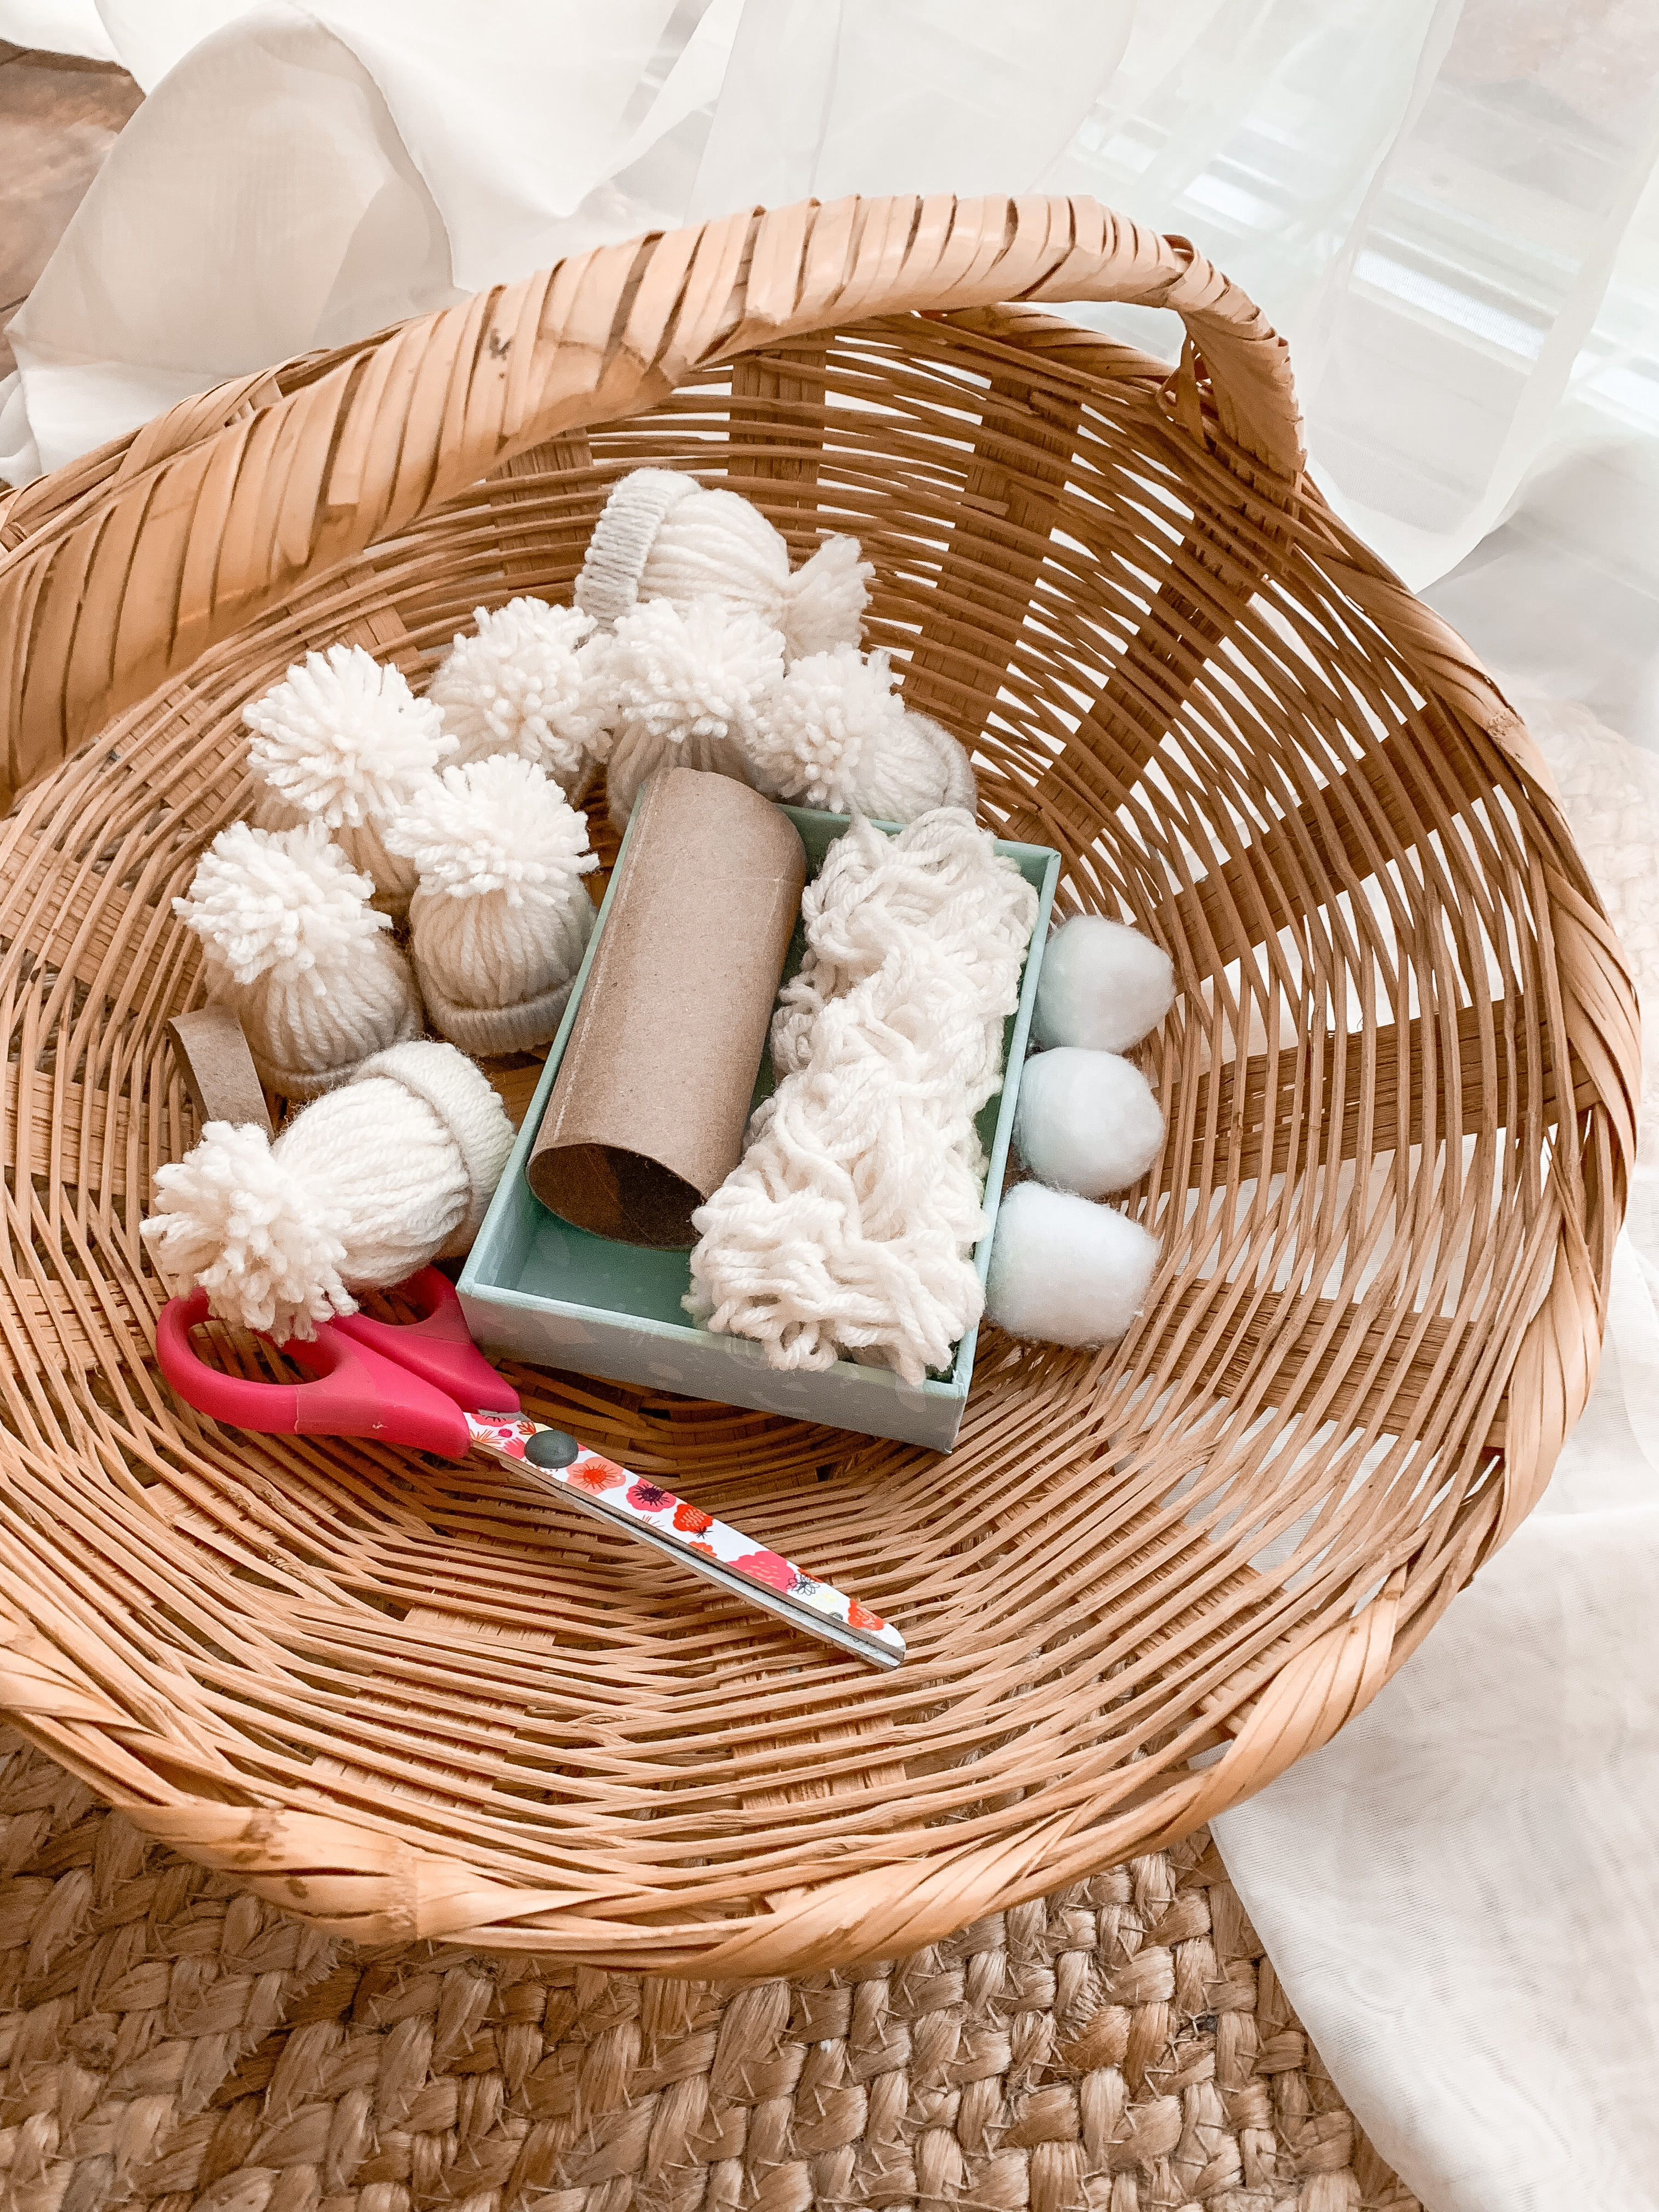
Materials you’ll need:

  1. Yarn
  2. Twine
  3. Empty toilet paper rolls
  4. Cotton balls
  5. Scissors
  6. Something (a book, small box, etc.) to wind the yarn around in ored to cut your equal strands. I used a box that use to contain thank you cards.
  7. Large eye threading needle (I used a bobby pin because I don’t own a needle and it worked great!)
  8. Optional: Beads
https://trapunto.files.wordpress.com/2
008/08/larksheadknot_1.jpg
  1. You’ll need to prep a few items before beginning the assembly, so first, take your yarn and your box and wrap the yarn around the box tons of times. When you start to think you won’t be able to cut through the strands, stop and cut.
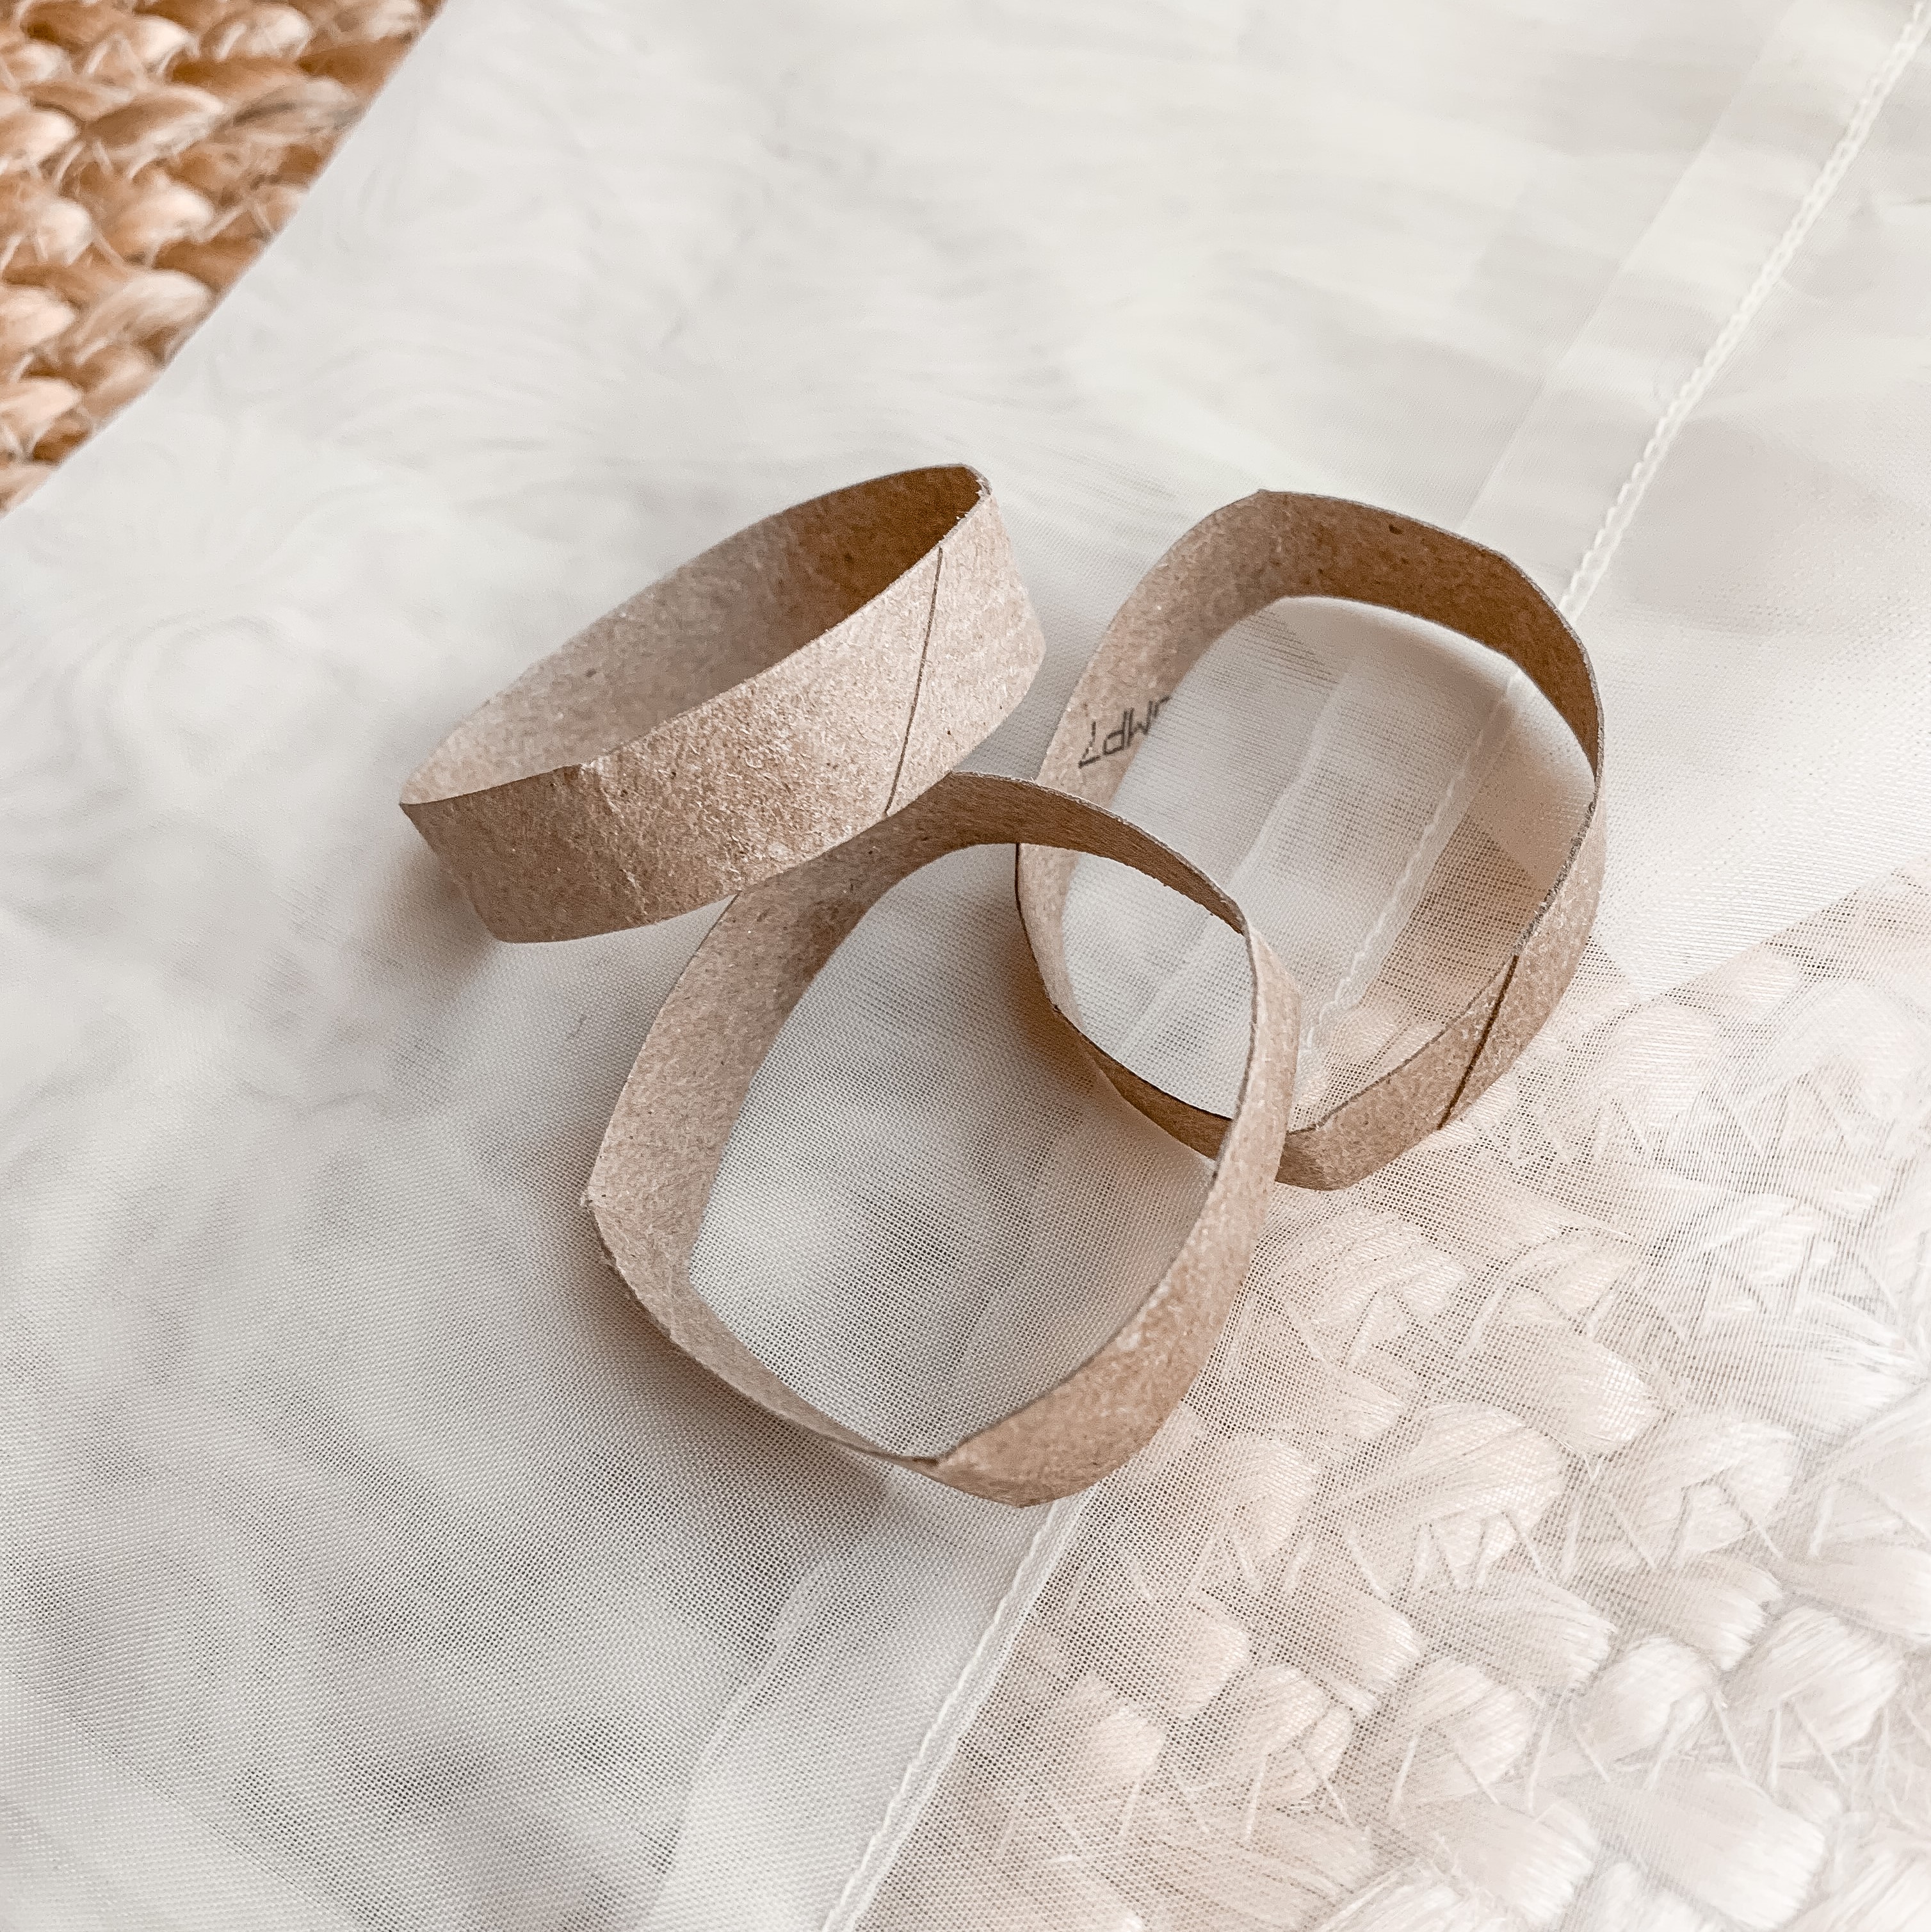
  2. Next you’ll want to prep your toilet paper rolls by cutting them into thin strips (as seen above).
  3. To attach your yarn strands to the roll, fold the string in half and loop it around the roll, feeding the two ends back through itself. This knot is called the larkshead knot and looks like this. ā†’
  4. Do this repeatedly until you have made it all the way around the roll. Grab all of the loose ends of string and feed them through the roll.
  5. Stick 1 cotton ball in the mouth of what will soon be your hat, then tie the ends with another pieces of string and trim the tips to imitate a pom-pom!
  6. To sting them , you’ll need your needle (or in my case, a bobby pin…) and to tie the twine around it.
  7. Remove the cotton ball so youll be able to get the needle in and out easily and replace the cotton ball after the hat is completely on. If you use a bobby pin, this could be tedious and you’ll need to be careful because the clip can snag your yarn and undo your hat. Be patient and move slow!)
  8. Move the hats down the twine to make sure you can fit them all on there and add beads wherever you would like them.
  9. When you’ve finished stringing your hats and beads, cut the end still connected to the ball of twine and tie both ends in a double knot.
  10. Hang where all can enjoy it for the holiday season!

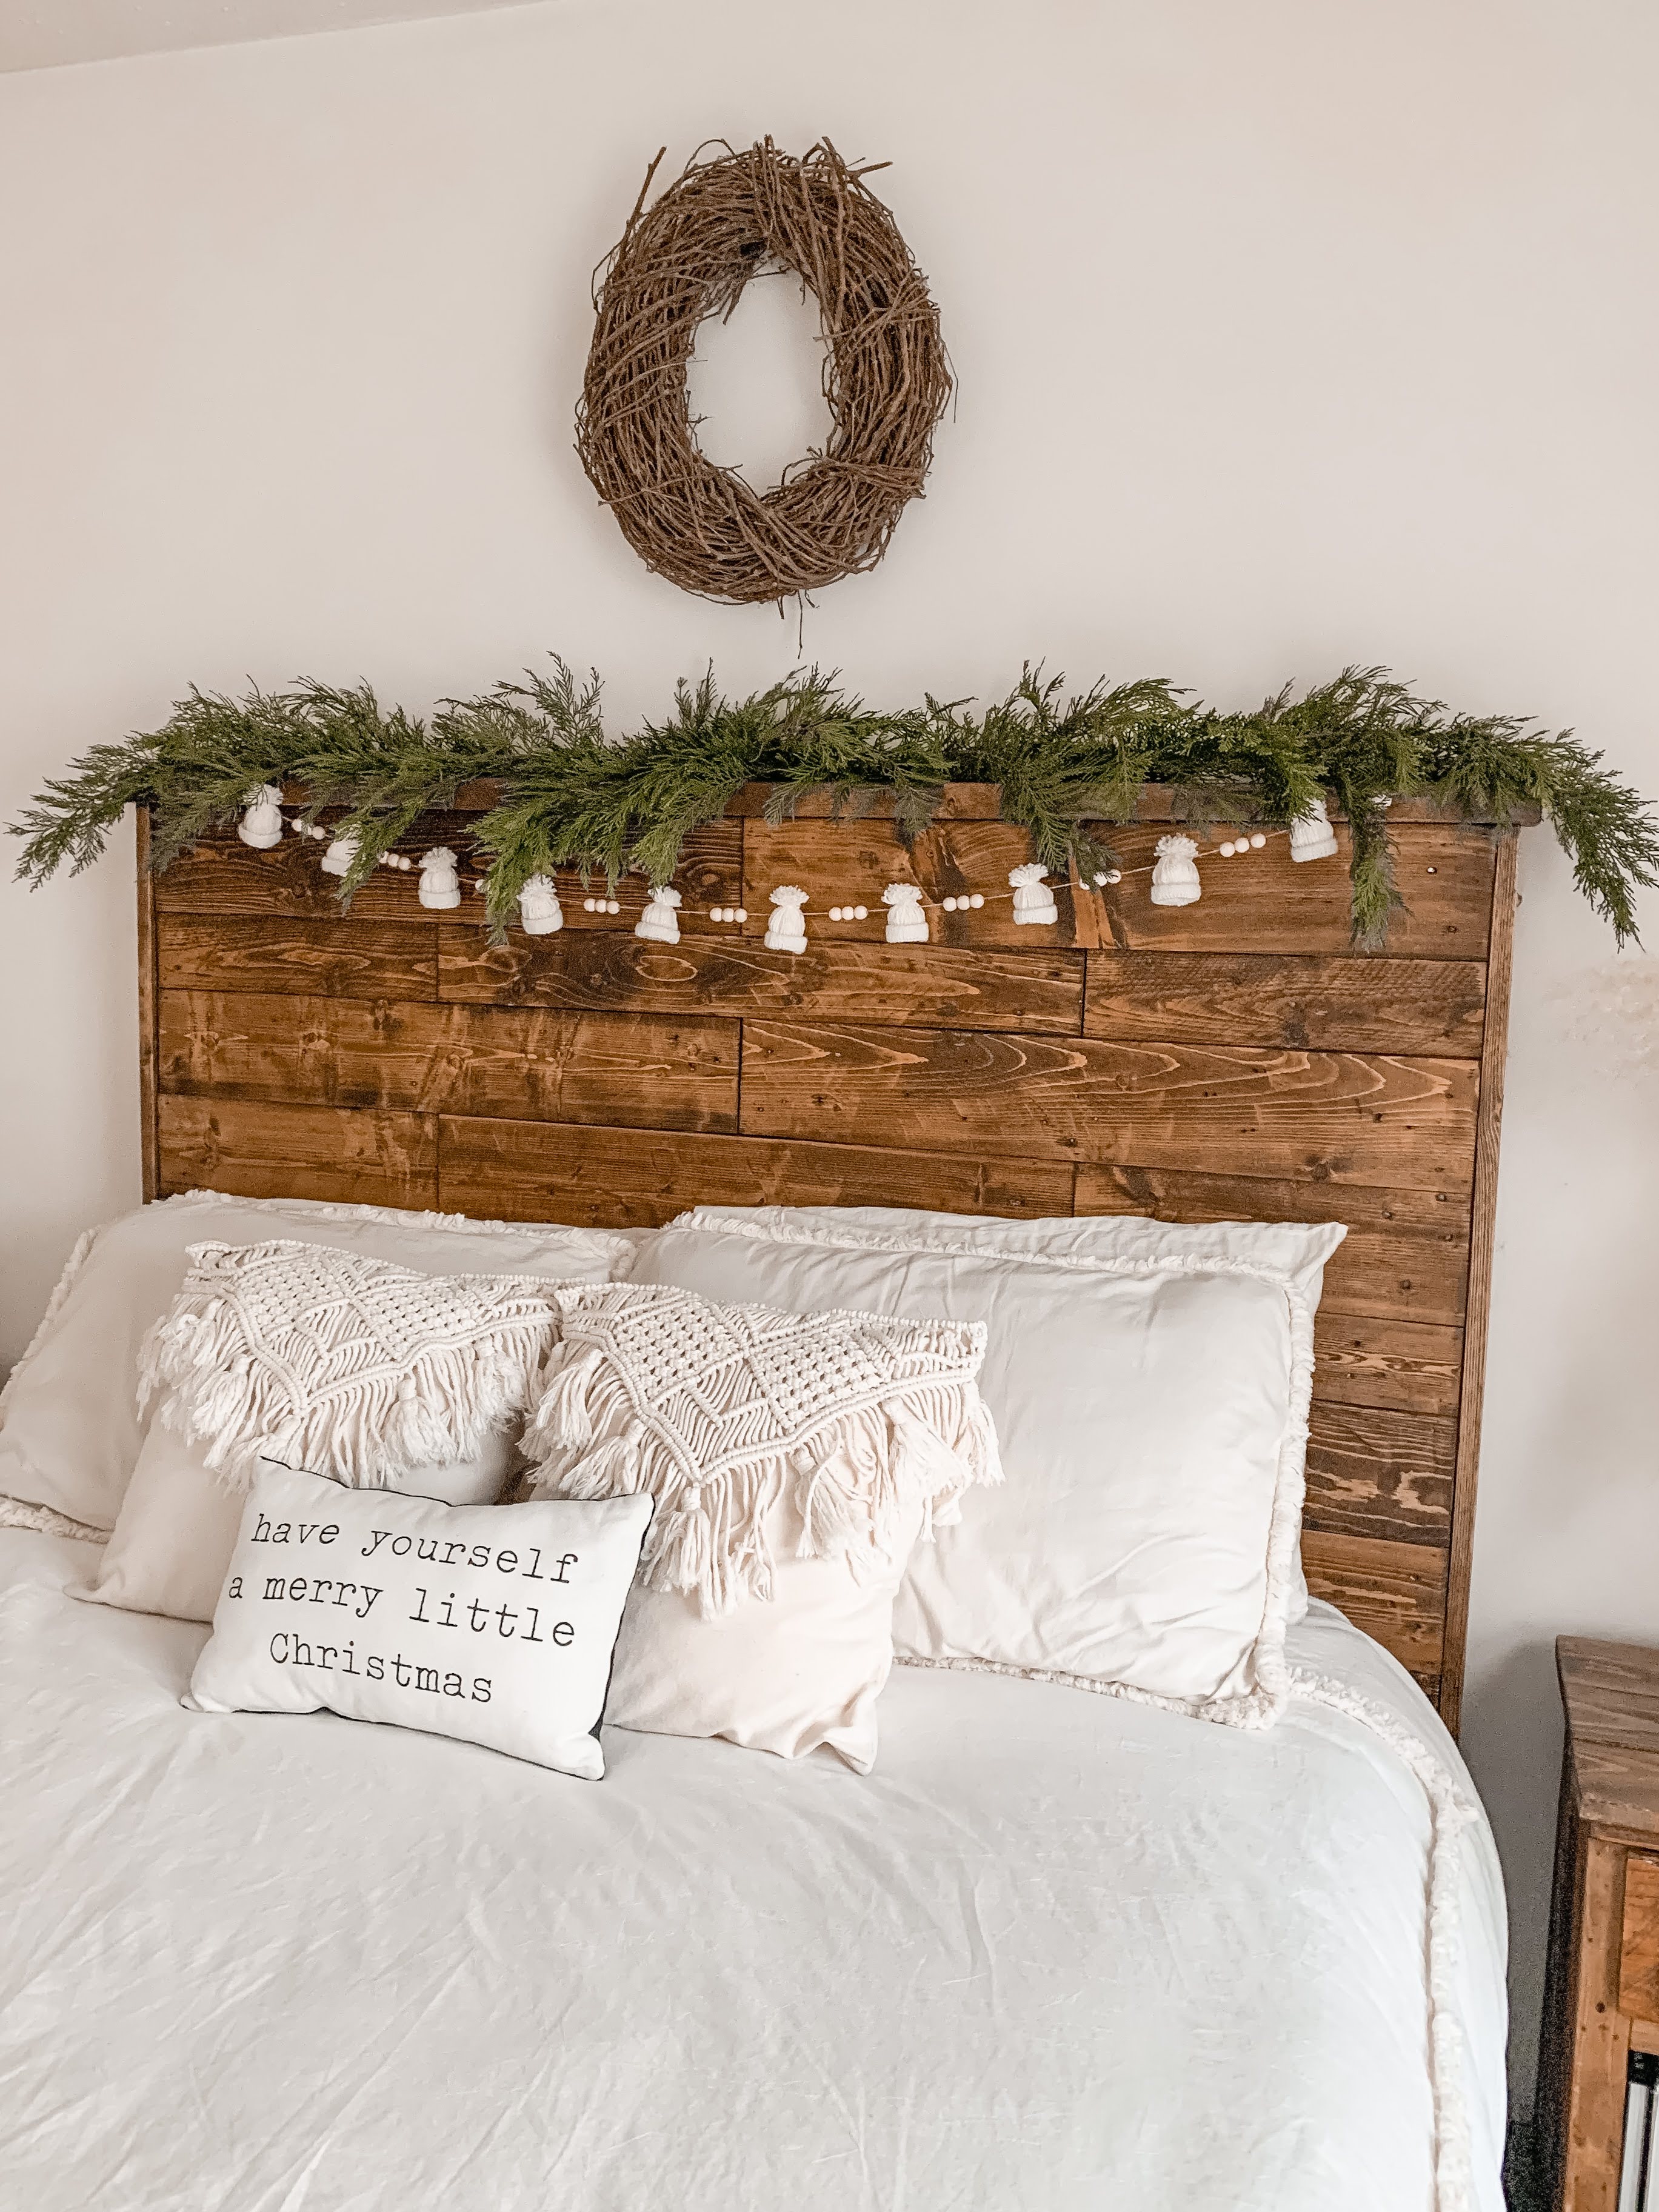
I go so lucky because I already had all the items I needed to make this lying around my house so it didn’t cost me a cent and I had so much fun making this. I had considered hanging it on our tree but I already made a 12 foot beaded garland and dried oranges for it and didn’t feel like a thirs garland woul look right, so I honestly had NO idea where I planned to hang it until I was sitting in my bed stringing the hats, but my last minute decision to attach them to our head board with added greenery turned out really cute and I’m so happy with the way it looks. If I wanted to go all out, I could even add some twinkle lights left over from my wedding that are sitting in my basement!

I really wanted to link my Christmas throw pillow, but I can’t find a link anywhere. It’s from Target and had emerald green tassles on the corners that I didn’t like and cut off.
Macrame pillows
Duvet cover
Beads

Thanks so much for reading! I hope some of you try to make this!

x Abigail

November Playlist – Christmas Edition

Previoulsy, when I do Christmas playlists, I match them to the month of December since Christmas is in that month, but this time around, I want everyone to enjoy my favorite Christmas music all through Christmas time leading up to the holiday. The November playlist is officially the month that the Christmas songs will be posted for all to see.

I am totally in love and obsessed with Sleeping At Last and, more specifically, their Christmas album, so I really had to branch out to make the playlist more diverse when I truthfully wanted to just copy and paste the whole thing alone, haha! These songs fall on the softer side with a slight indie twist. A lot of my song choices are biblical, but mixed in with other fun classics. My preference lean towards calming songs that would pretty in the background as you work around the house, cook, or entertain small, intimate groups. Nothing too overpowering or loud. Maybe later in December I’ll post my upbeat Christmas songs that I like but don’t usually play continuously throughout the season.

I hope these are fun for at least a handfull of my followers! Merry Christmas!

xo Abigail

High Chair Refurbishing

Eeeeek! I am so excited for this to be my first “Design” post. I created this section of my blog because I absolutely love interior design, DIYs and all things aesthetically pleasing and I knew that it had to be included on my site. Over the last year, my husband bought his first home and I had the pleasure of decorating and really making it a home, but now that we are married and I am officially moved in, I can do even more of that in our space. I have so many things that I wanted to be able to show off and share and not everything makes it to my Instagram, but I am hoping that my blog can be a space for me to really document as many projects as I can and feature a lot of home decorating over the years, especially when the time comes for us to build and move into a new home.

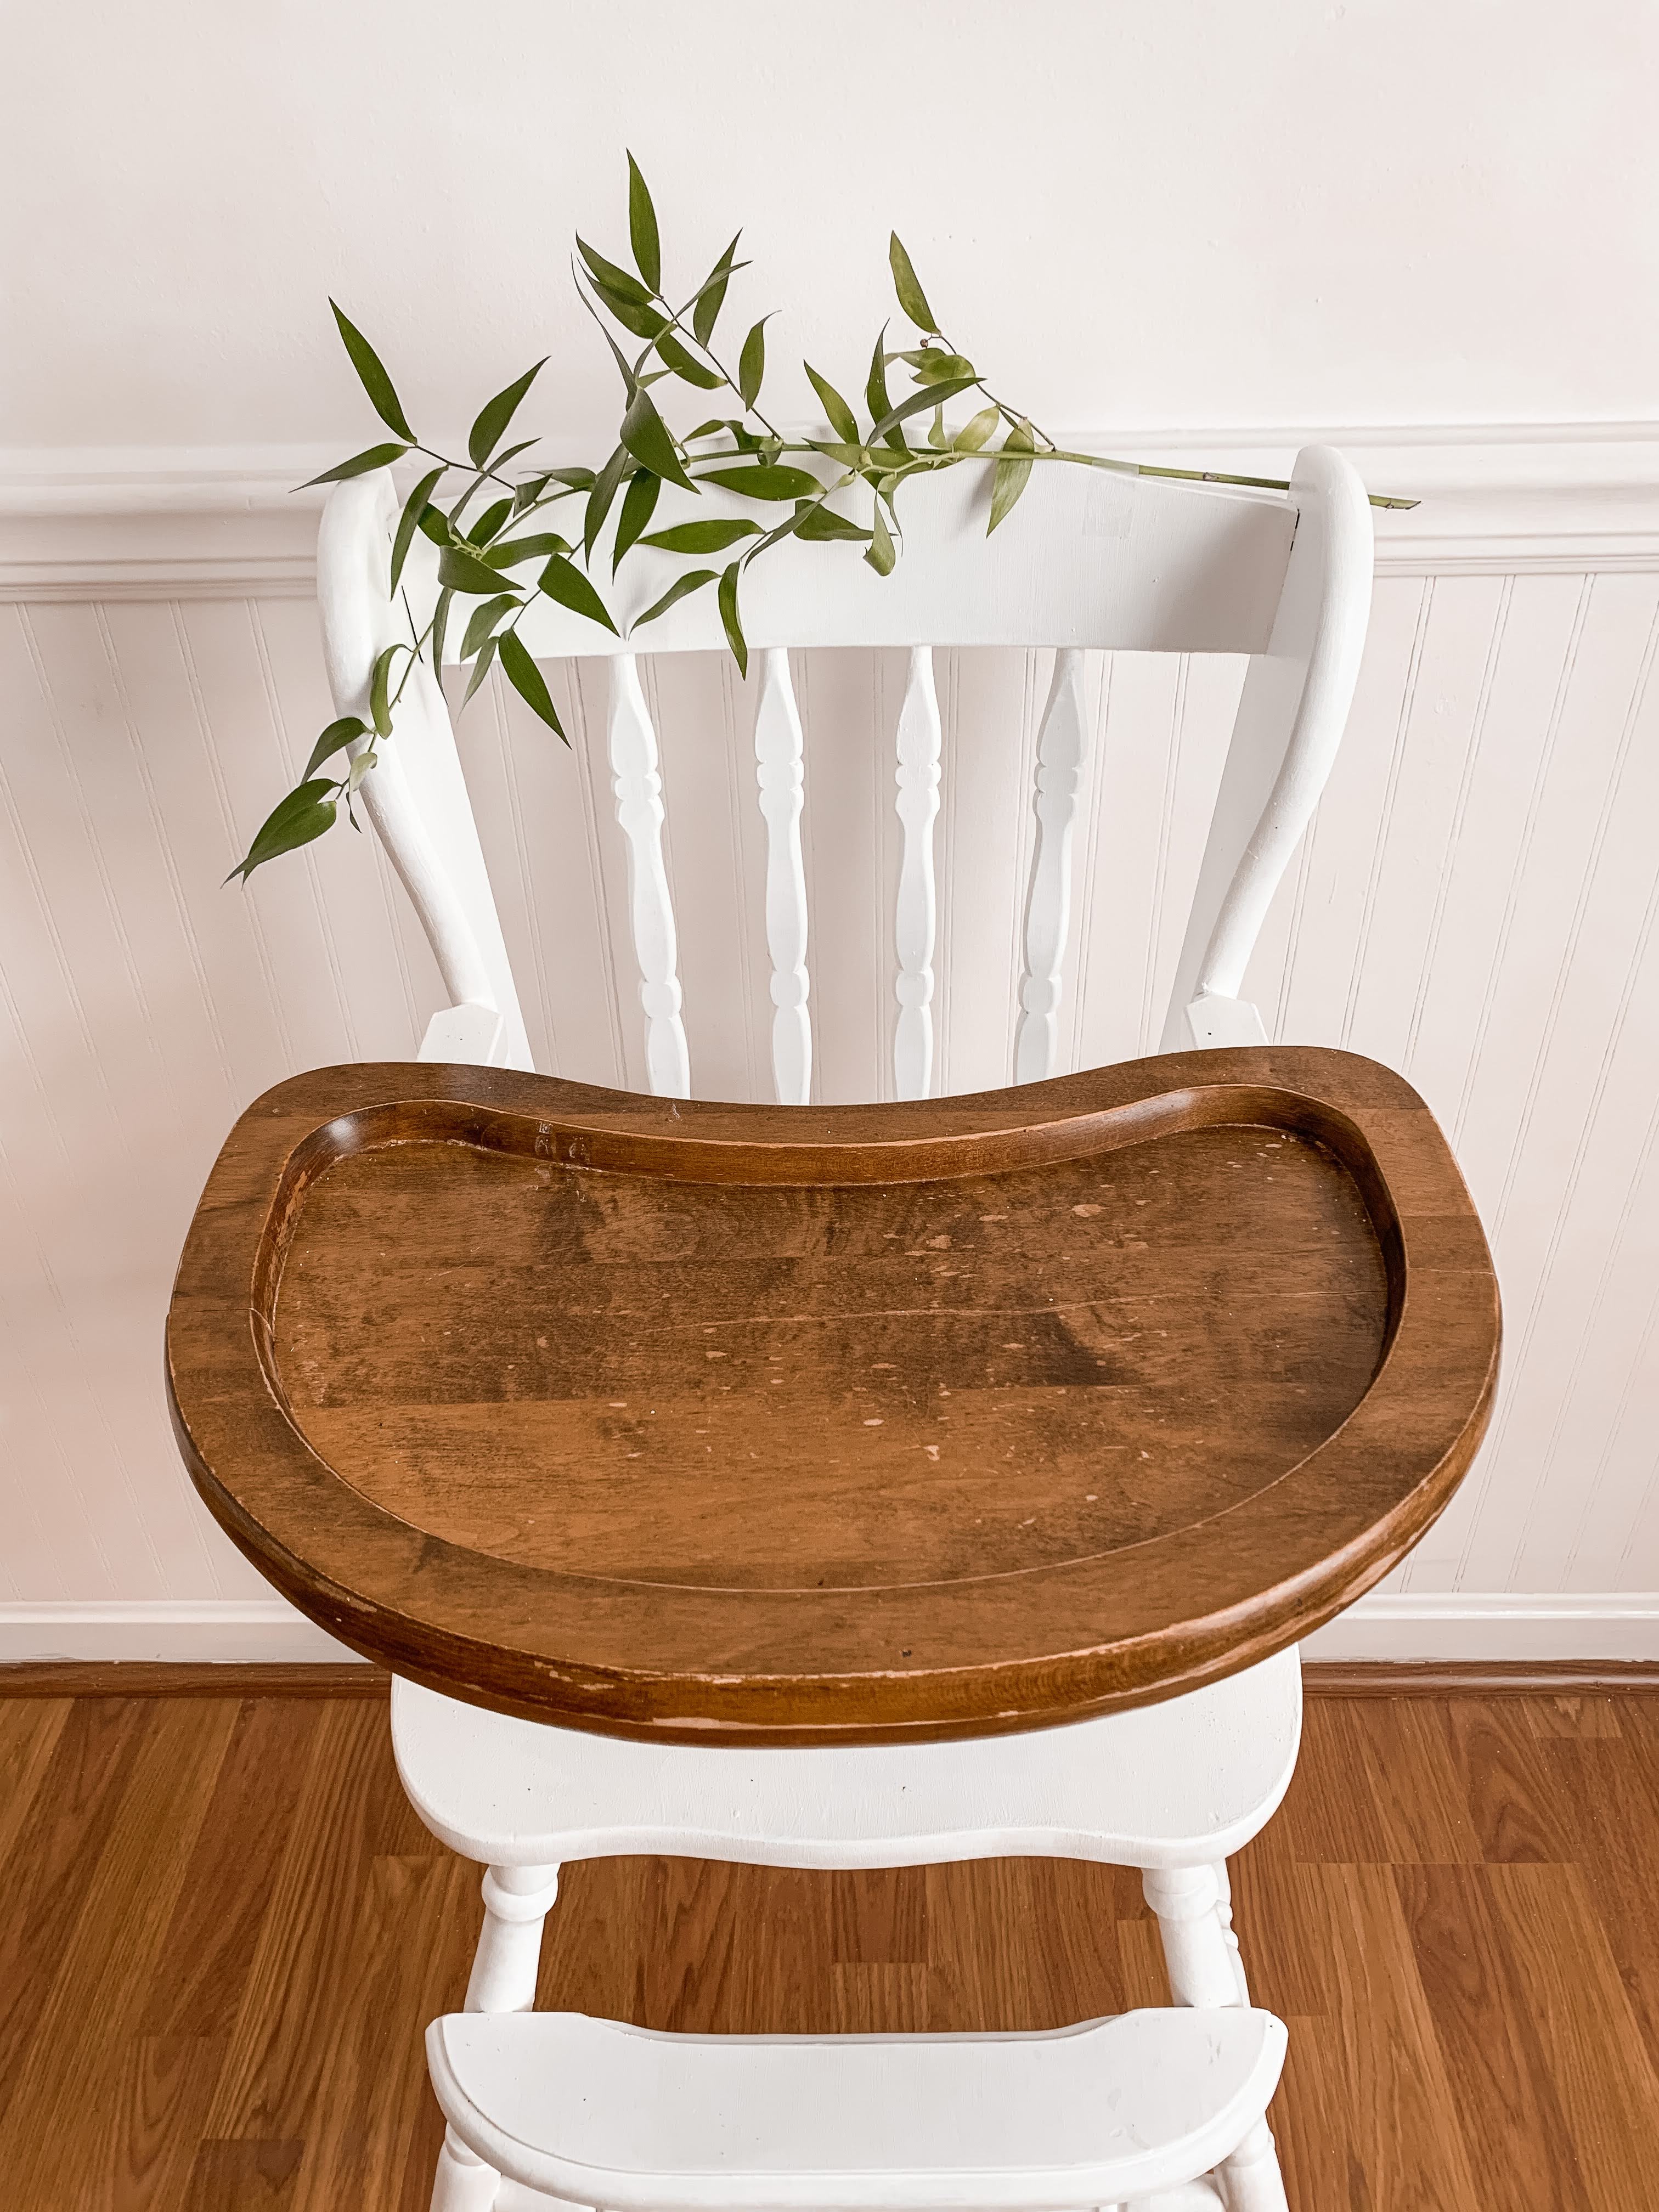
This high chair was something I eyeballed at the thrift store over a matter of weeks and when they marked it on sale for only SEVEN DOLLARS, I knew the time had come to bring her home. I have a love for older items with character and what has more character than a wooden high chair with lots of carvings? When I first brought it home, I had a hard time deciding to paint it because I love natural wood and loved the particular color of this wood. I asked opinions from a few friends and I had them telling me that painting it white might look girly and since I had a son, I would want to leave it natural or paint it an orange or brown, but those colors weren’t sitting right with me and I went with white. I am so glad that I did and couldn’t be happier with the way it looks. It was everything I had envisioned.

My inspiration came from a Pinterest photo where the photo was featured in a toddler’s birthday photos, which I really wanted the high chair for, but didn’t find it in time. This high chair is Brooks’ full time high chair that we use daily for every meal and it is super easy to clean and buckle. Everything is super sturdy and safe. The white is sometimes hard to scrub clean if I miss a spot and the food hardens, but if cleaned immediately after a meal, there are no problems!

After a few weeks of using the high chair, I noticed a substantially large crack in the top of the tray that I was afraid would get food and water shoved down it and cause it to rot. I took the tray to my grandfather, who is an amazing woodworker, and he was willing to fix it! He ended up having to take the hardware off and snap the entire thing in half to properly clean and fit the pieces together properly and when he returned it, it was good as new! It’s polished and functions perfect!

The tray was something I never planned to paint mainly because I knew with all the ware it would take, there would be a good chance of chipping or water damage and I didn’t want to chance the paint getting into his food whether or not it wass toxic. I absolutely love the way it looks with the painted chair and unpainted tray. It’s so unique and antique looking. An instagram page that focuses on refurbishing called @revivefurnishings saw the post I made on my Instagram of the high chair when I first finished it, and made a beautiful chair themselves completely inspired by my chair, which I thought was pretty cool!

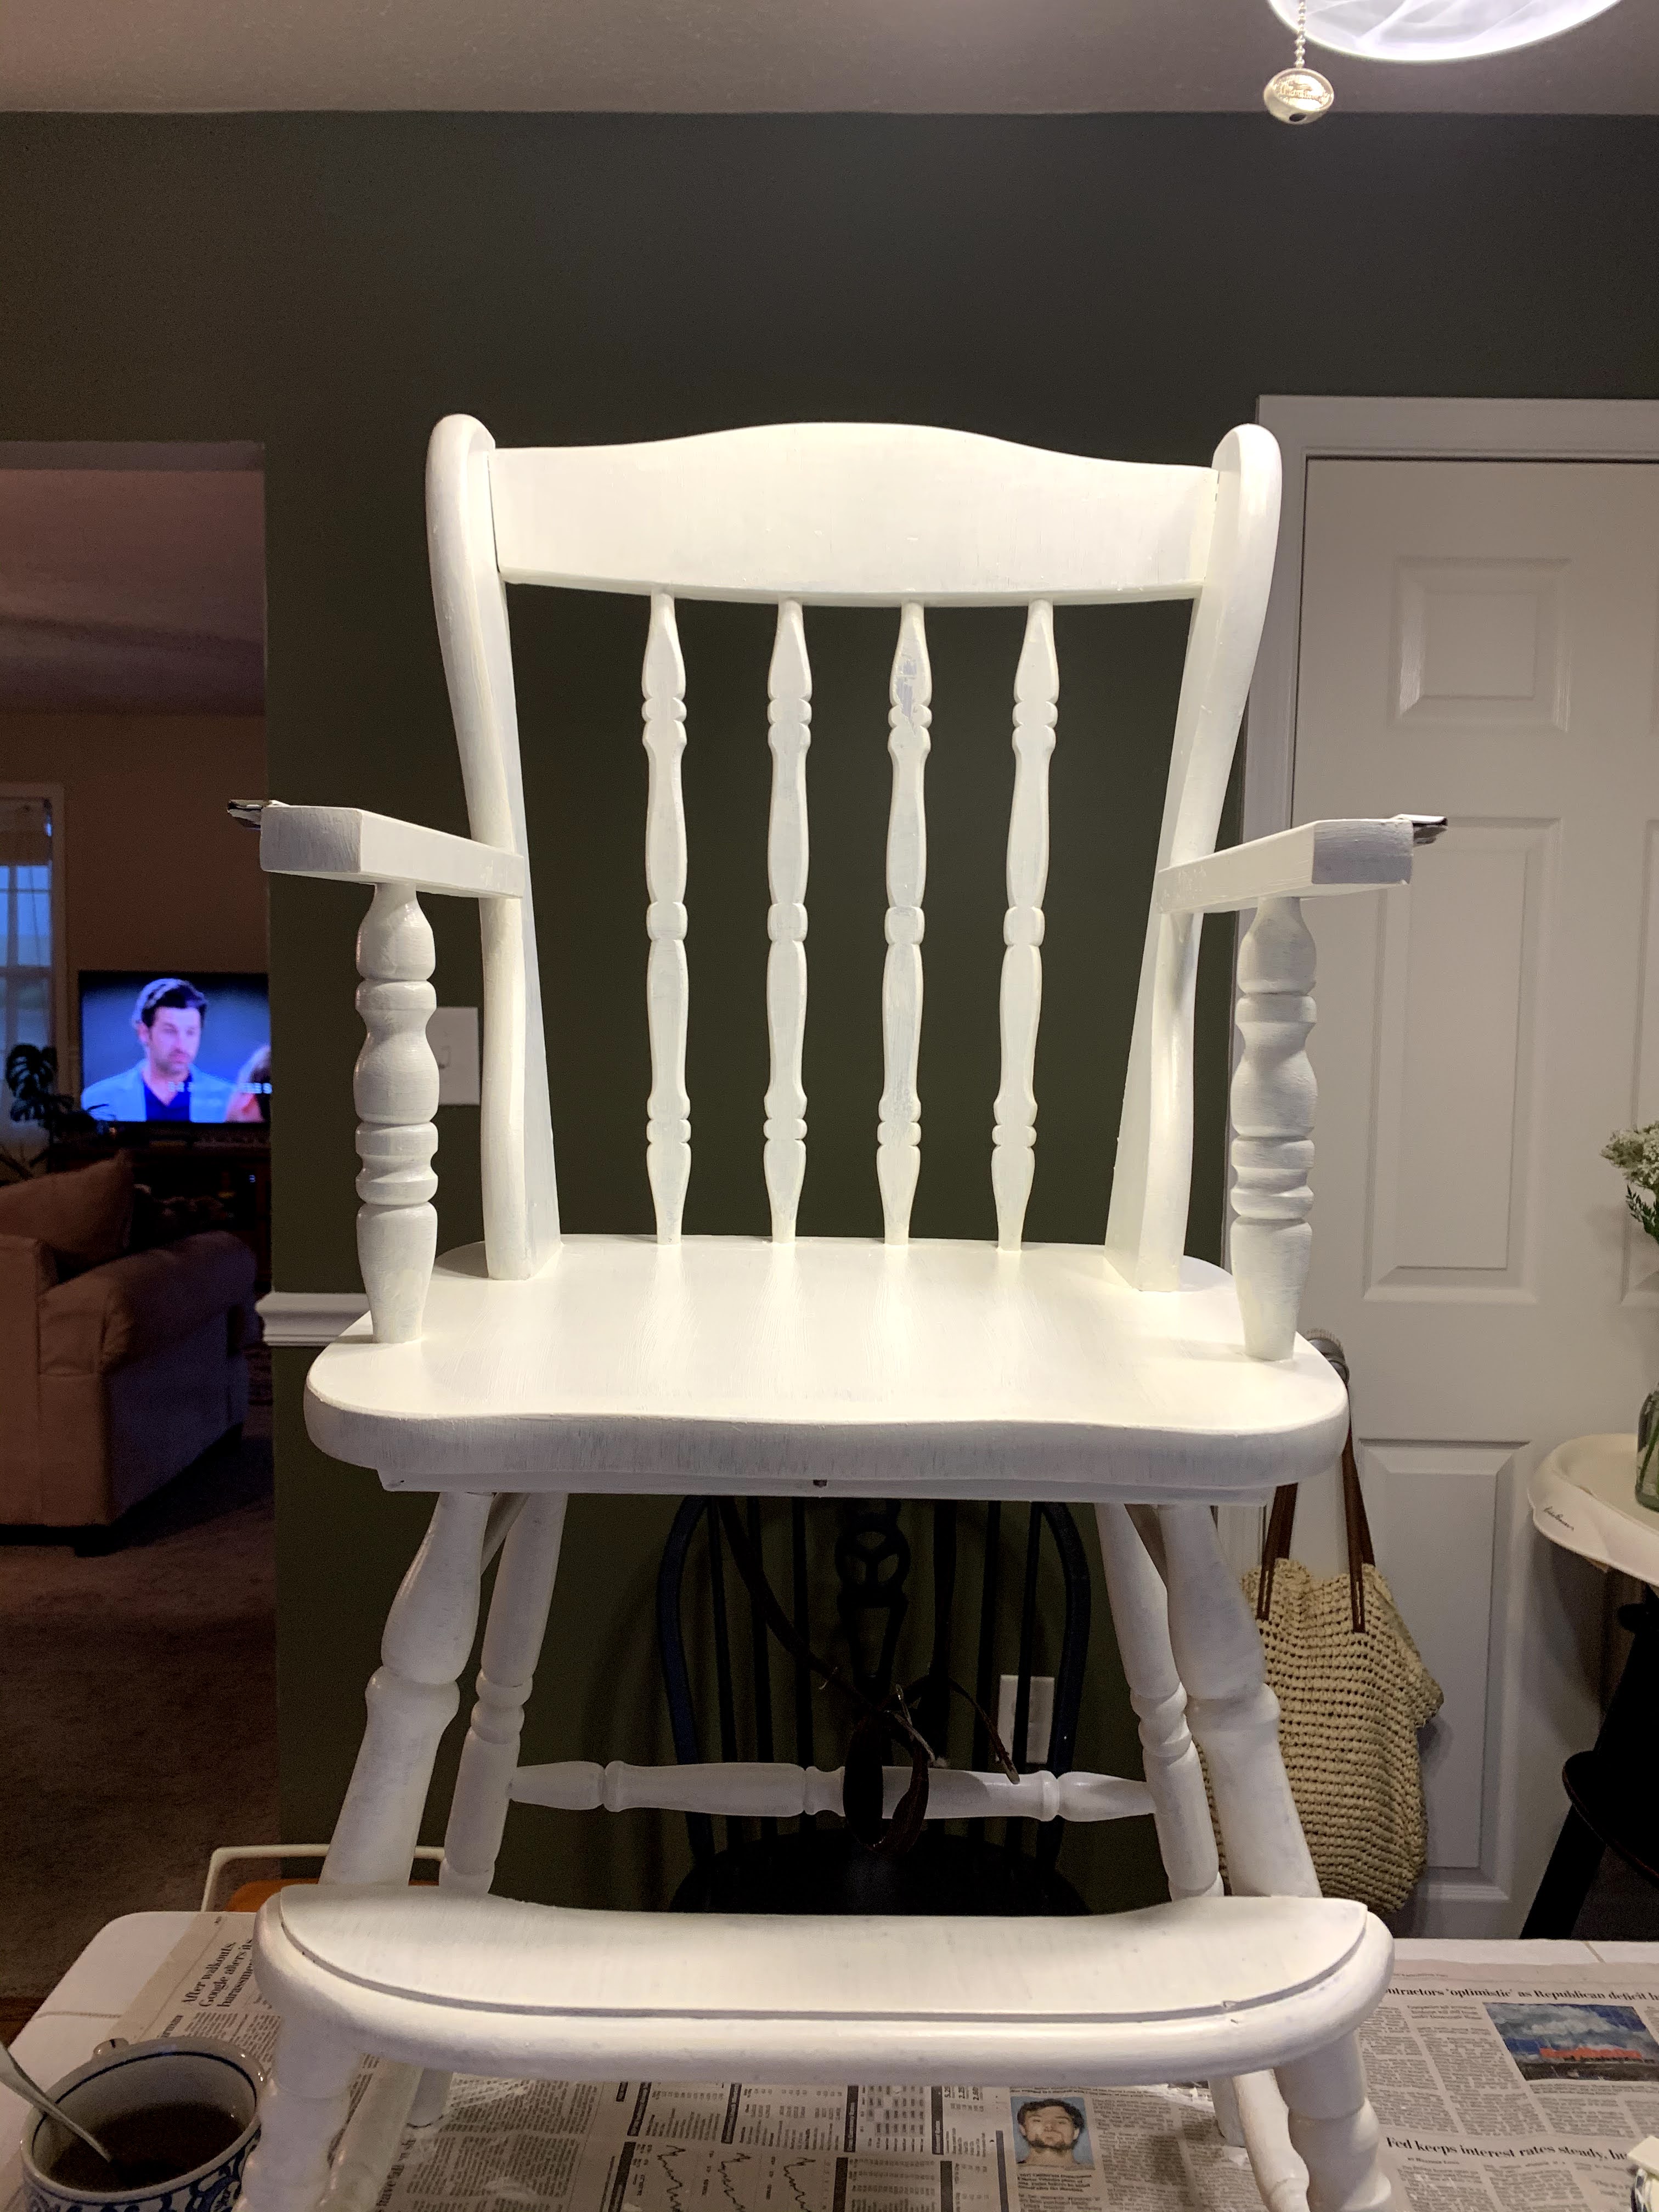
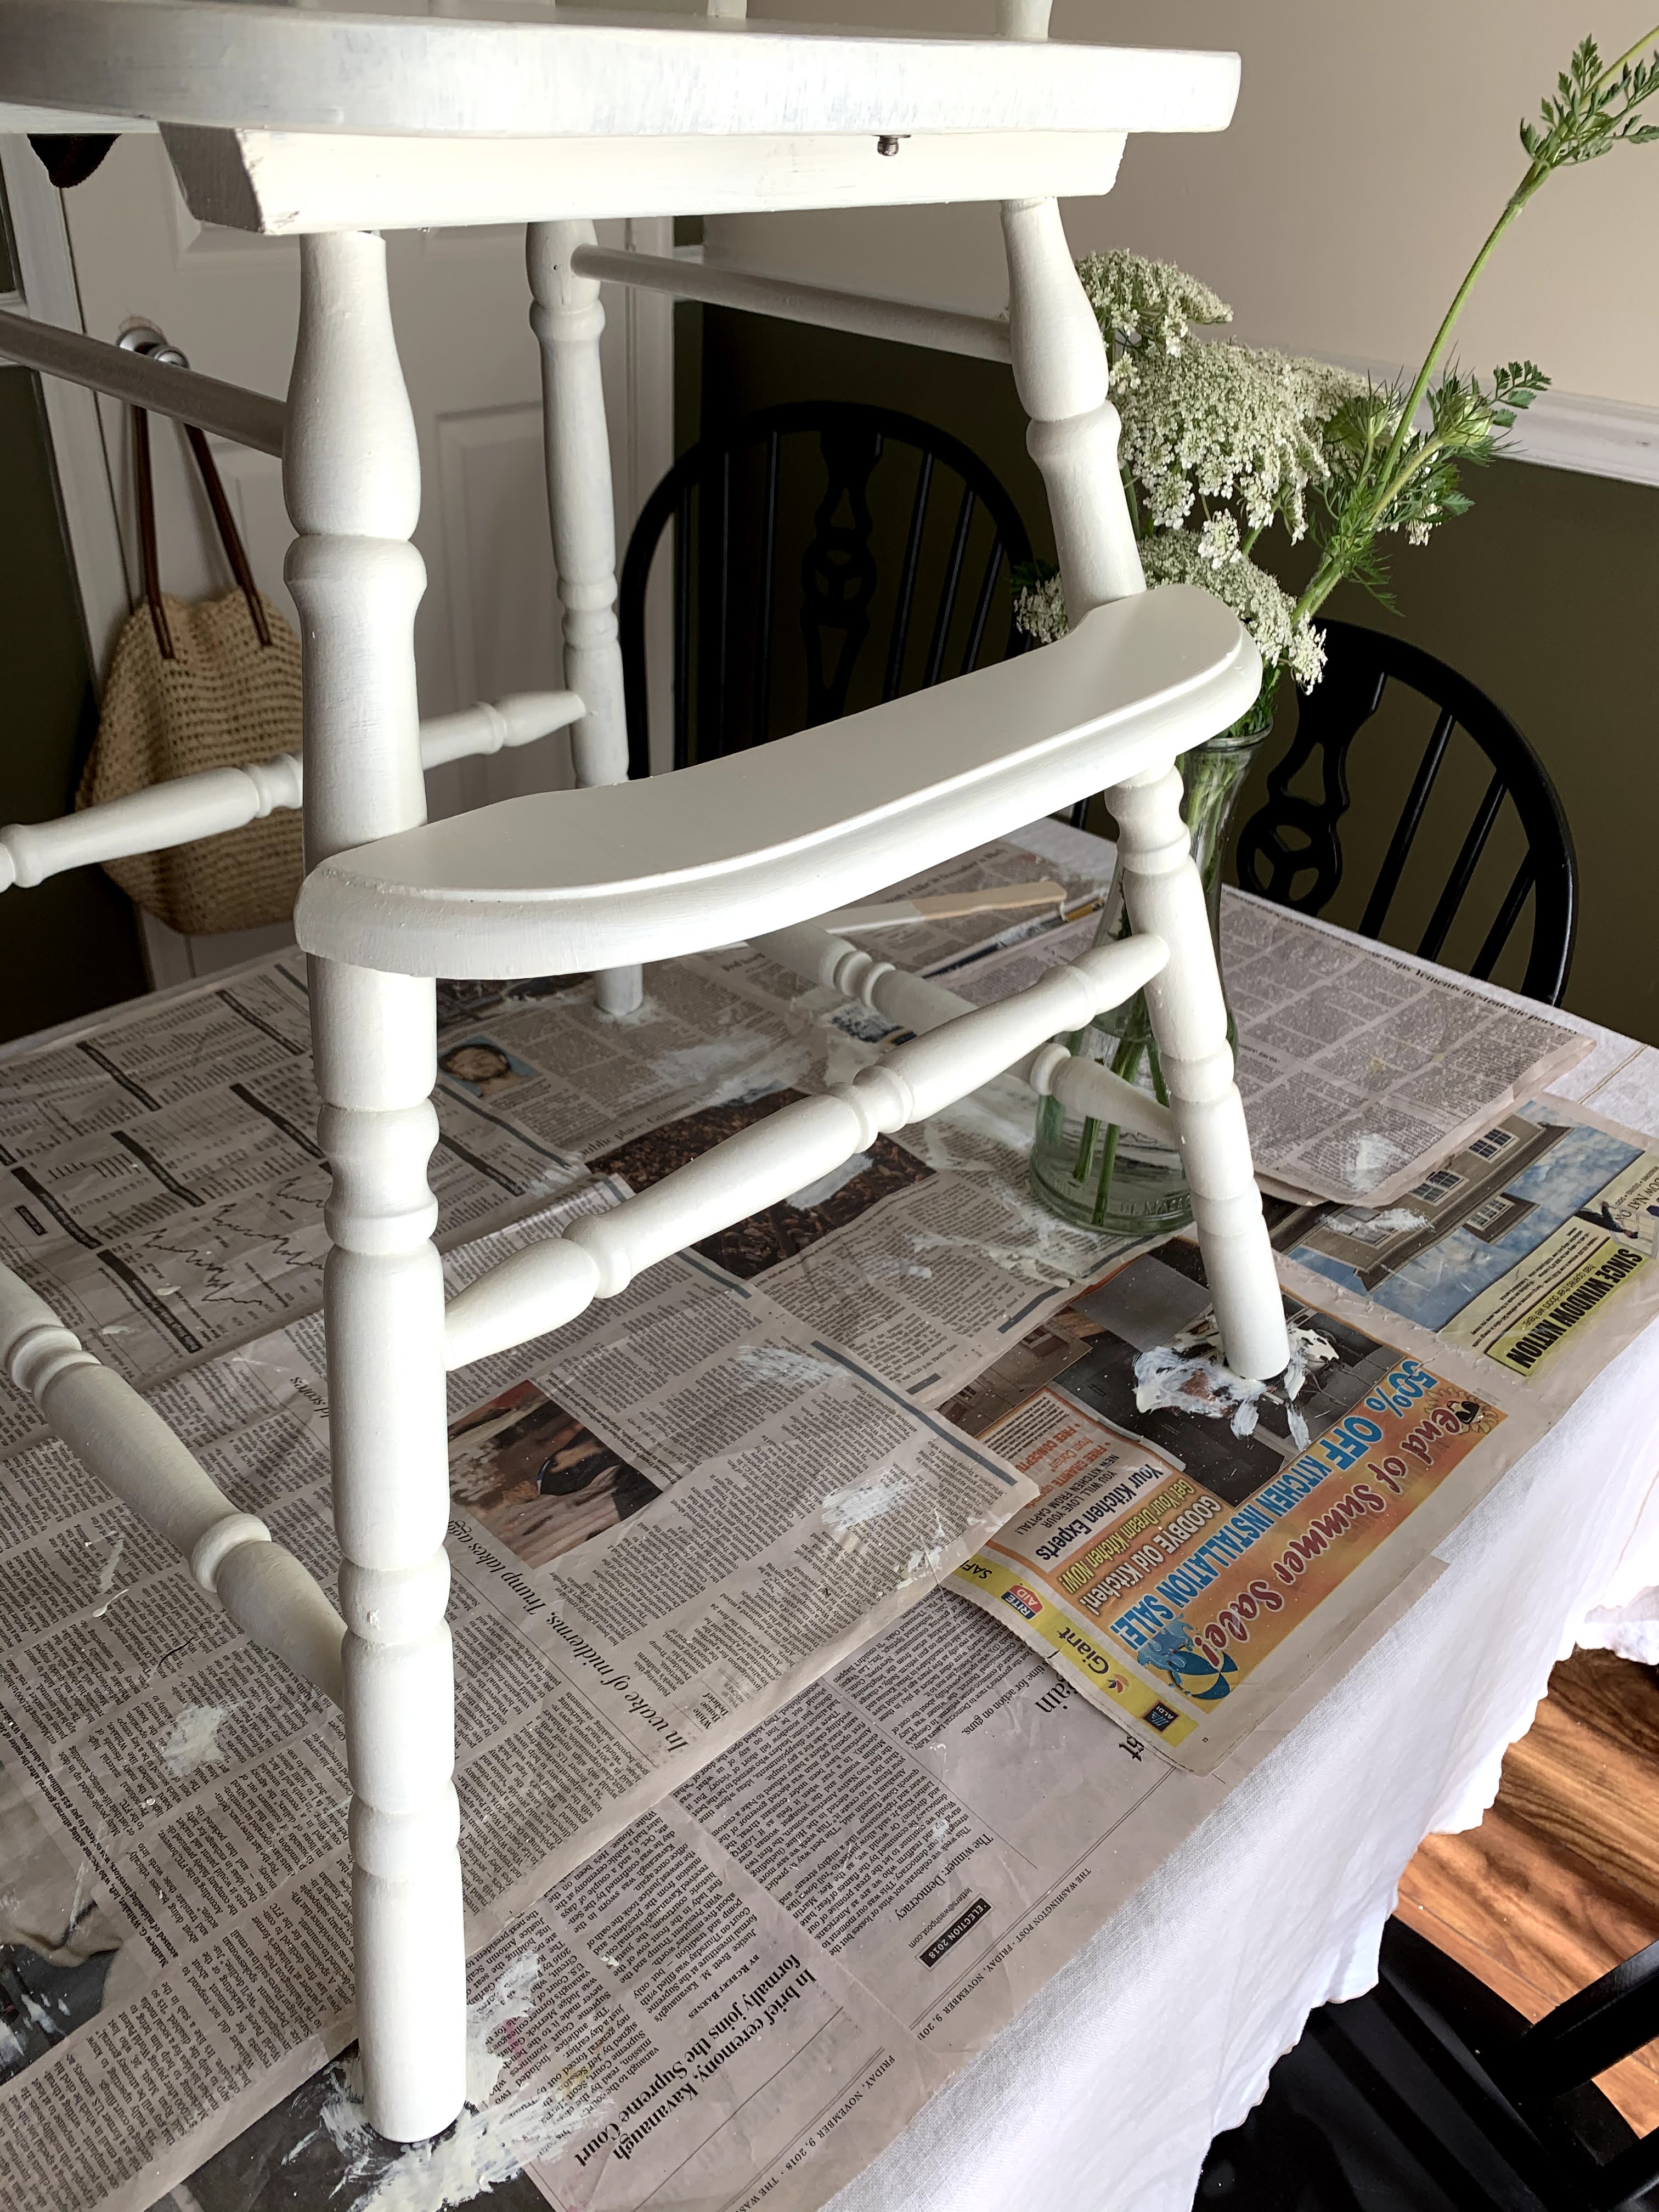
I’m going to leave a few photos below of the refurbishing this chair just for fun. The whole project took 3 coats and then a round of touchups and that process is fun to see. But first, here are some tips I will give to those of you who want to try doing this yourselves:

1. Don’t just get any paint. Buy paint that is specifically made for wood. I used regular wall paint (like an idiot because I had no idea what I was doing) and while it hasn’t caused any issues, the paint holds to the wood much better and goes on less tacky.
2. Don’t use a polyurethane that is going to leave a yellow coat on top of your paint job. You want to find one that is NOT oil based because the oils are what leaves the film causing the yellowing. Make sure you do some research or ask the workers at your local hardware store for advice on the best clear coat to protect your work!
3. Before beginning the painting process, clean the surface really well and allow to dry. If you paint without cleaning there could be dirt, hair, (and in this case) food, that will cause bumps underneath the paint and any moisture will prevent the paint from adhering to the wood.

Thank you so much for reading ā¤

xo Abigail

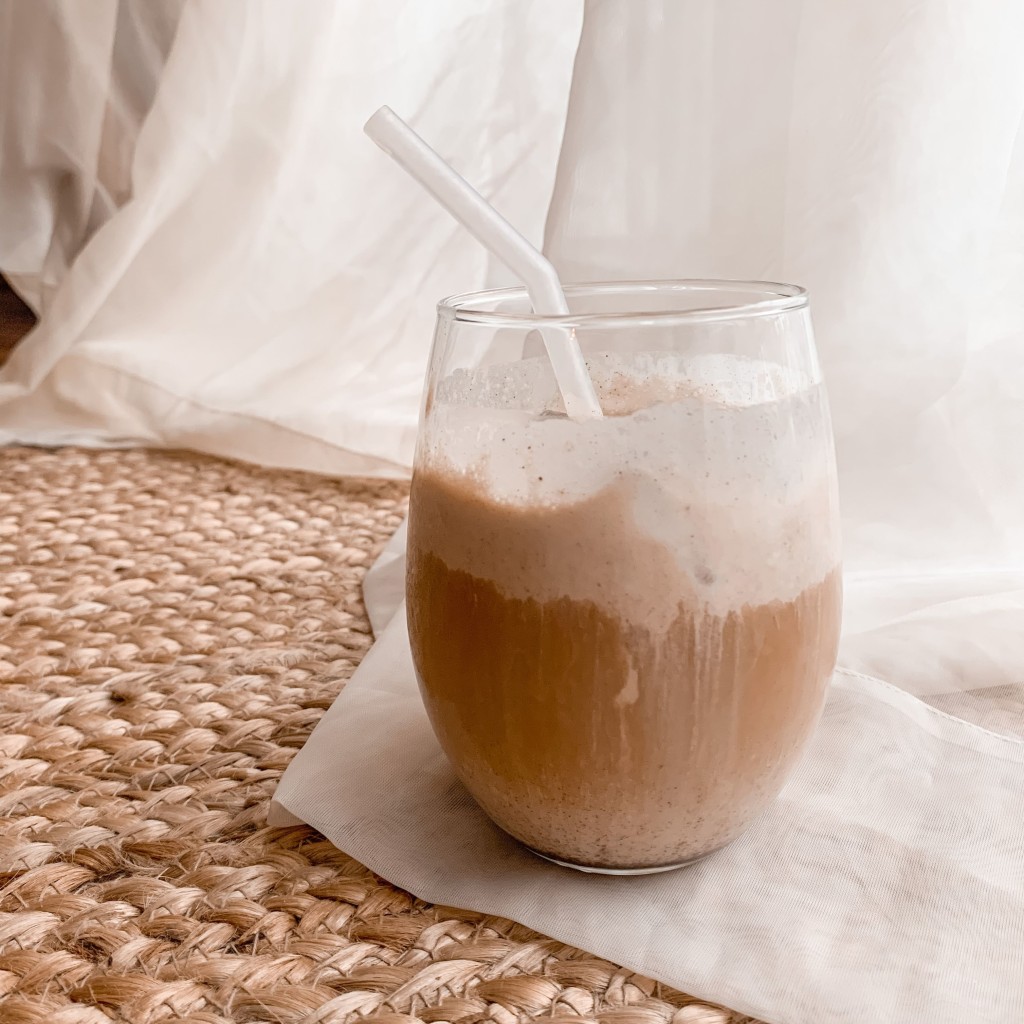
At-Home Pumpkin Cold Foam

We all love the Starbucks pumpkin cold foam. We just do, it’s a fact. There’s nothing better than the sweet, creamy taste of it sinking down into our coffee as we drink it trying to slowly wake up in the morning. It’s just comforting and delightful to our tastebuds. I tried making it once before and it turned out so bad that I had to go online and find what would make it sweeter and allow the pumpkin not to be too overpowering. Alas, after I got a feel for the ingredients I would need, I trial and errored a few concoctions to come up with the perfect combination that tasted as close to the Starbucks cold foam as possible.

What else would I do but to share it with everyone?! After all, it is Thanksgiving and we all need this to be part of our holiday morning.

INSRTUCTIONS:

  1. Take a small bowl and add all your ingredients to it at once.
  2. Grab your hand mixer and only insert one beater, then proceed to plug in and mix your ingredients for about a minute until they are completely combined.
  3. Pour over your coffee and enjoy!

–This recipe makes enough cold foam for two drinks. You can double it to make more if needed! If you prefer a lot of cold foam, it will probably need to be doubled to top more than one coffee equally.

INGREDIENTS:

  1. 1/2 cup heavy whipping cream
  2. 1/4 cup sweetened condensed milk
  3. 1 tbsp pumpkin pureĆ©Ā 
  4. 1 tsp vanilla extract
  5. 1 tsp cinnamon
  6. 1 tsp powdered sugar

–A fun trick I learned recently is if you don’t have powdered sugar but have regular white granulated sugar, you can blend the granulated sugar and it will become powdered sugar. Makes perfect sense, but it’s not ever something I realized or thought about. You can also choose to go even lighter on the pumpkin pureĆ© if you would like to mute the taste to even a smaller hint. I already curated it to be a small hint, but if you really don’t care for an obvious taste of pumpkin, I would suggest cutting it down to a half teaspoon and you should be good to go!

MY COFFEE: This coffee is the Good & Gather Toasted Almond and Caramel (you can also get these in Keurig pods) which I refrigerated and the poured over ice with a splash of Torani vanilla syrup and a splash of the Coffee Mate Cinnamon Toast Crunch creamer. Creamer and syrup can be found anywhere, Good & Gather is only at Target.
Pictured in just a basic large stemless wine glass, similar ones can be found here.

Keto Egg Roll in a Bowl

Over the summer I travelled to Virginia to spend the day with my Aunt who was visiting from Boston. She’s been making a lot of easy keto friendly recipes for her lunches and dinners and whipped this one up real quick for our lunch that day! I was a little unsure about it considering I don’t enjoy eating tons of meat, and I dislike sole slaw, however, this dish is SO GOOD. It was way better than I could have imagined. From this, I learned that I actually DO like slaw and ground turkey is not that bad. This was a dish totally outside of my comfort zone and it was way worth it.

DIRECTIONS:

I usually use a large stock pot that way I only use one pan and has a lid to cover for speedy cooking.

  1. In your large pan and over a medium-high heat, fry your lightly beaten eggs and set aside.
  2. Add olive and sesame oil to the pan still o the medium-high heat and cook your ground turkey until browned. Season with salt and pepper. Browning should take about 6-7 minutes.
  3. Once browned, add your scallions, garlic, and ginger, then lower the heat to medium and contine to cook for 3 minutes.
  4. Pour in your bag of coleslaw and mix it into the meat until the slaw is tender, then add the soy sauce and cooked eggs, stirring until everything in the pot is cooked through. Re-season with salt and pepper if needed.
  5. Serve and sprinkle with sesame seeds for garnish and enjoy!

INGREDIENTS:

  1. 1 lb ground turkey
  2. 12 oz broccoli slaw (This is the one I use)
  3. 3 eggs
  4. 1 cup chopped scallions
  5. 1 tbsp minced garlic
  6. 1/4 cup soy sauce
  7. 1 tsp olive oil
  8. 1 1/2 tsp ground ginger
  9. 1 tsp black pepper
  10. 1 1/2 tsp salt
  11. sesame seeds for garnish
  12. 1 cup uncooked rice for a side, but it’s honestly better and remains a keto recipe without it.

This was such a fun dish to make and so delicious. Now all those who requested the recipe can enjoy it with me! Happy cooking!

A Rainy Day at the Pumpkin Patch

On Saturday, October 24, 2020, the rainiest, coldest, and probably muddiest day of the farm’s fall season, we headed to the pumpkin patch! If the farm had been closed for rain days, offered refunds if it rained, or allowed us to use the credit on a different weekend, we may have not gone and pushed it back to a weekend in November. However, because of COVID, the rules were a bit different this year which didn’t allow any of those things. We bundled up in scarves, jackets, and hats and piled into the car heading towards Bowie, Maryland for a little roadside farm called Queen Anne Farm!

I had been to this farm twice before back in college with my best friend both times, and my family one of those two times! We always have so much fin and it’s really nice because it’s never crowded. This farm doesn’t have a ton of activities and is more like a market, but I enjoy that because it’s more lowkey and less stressful! This time I went with my husband and my one year old, which was definitely an adventure. We got to show him the chickens and ducks and he got to pull a wagon of pumpkins (let’s be honest, this was his favorite part because it was dry and under the tent).

This farm’s admission is $15 per car and you use $10 of this cost as a credit towards pumpkins when you purchase! The most unique part of this farm is definitely it’s pumpkin playhouse for children! I thought it was just the cutest thing ever and we had a hard time getting Brooks to come out of it, he was having a blast! The patch of pumpkins itself was large and had good size pumpkins. It was muddy, of course because it was raining, so we didn’t spend a ton of time looking at the pumpkins in the field, but the stands in the market had tons of gourds and varieties to choose from!

There was a small field of sunflowers and a very long straight path of corn stalks to walk through. It was all very simple and the grounds were easy to navigate making it a fun patch choice for very young children who are easily entertained. When looking at Queen Anne Farm’s website, I could see that they had horses made from straw meant for children to sit on for photos, but unfortunately they were pulled off to the side under a covering to prevent them from getting wet so the lighting wasn’t good enough for photos on those that day.

(Had to include the photo of him totally NOT enjoying the muddy corn maze because it was just too funny, I couldn’t help it LOL)

The market had fresh apple cider by the gallon and half gallon, pumpkin and apple donuts, fresh fruit and vegetables and fall decor like corn and, as mentioned before, gourds! It was really cute and festive! We went home with cider, pumpkins, apple donuts, and a specialty cheese that Gary absolutely loves! If you have small children or just need a place to stop for a short time to grab fall decorations, this is your place! I would definitely recommend it, but don’t go into it thinking it will be a big festival, it’s very lowkey!

Hope you enjoyed a little peek into our 2020 pumpkin patch experience and that seeing the farm was helpful to those interested in visiting!

x Abigail

Fall Crockpot Pumpkin Chili

Last year, when I was in the grocery check-out, a woman said she was making a pumpkin chili recipe. After going on about how much of a difference smoked paprika made over regular paprika, she explained how she prepared it and served it in a giant carved out pumpkin on her dining room table when her family came over for Thanksgiving. After hearing her talk so highly of this special recipe, I decided that I was going to make it myself. As she had stated so importantly, the two key ingredients are a can of pumpkin pureƩ and smoked paprika.

INSTRUCTIONS

  1. First, prepare all your vegetables by chopping up your bell pepper and onion.
  2. Drain all your beans and pour them into your crockpot along with the chopped vegetables, crushed red tomatoes, pumpkin pureƩ, vegetable stock and stir until all is combined.
  3. Turn on your crockpot at a low temperature then add all your seasonings and stir, again, until all of it is combined.
  4. If you choose to add meat, add your meat after it’s been browned thoroughly.
  5. Leave to cook, stirring occasionally, for four hours.

That’s it! Very simple and very yummy!

INGREDIENTS

  1. 1 can of pumpkin pureƩ
  2. 1 can of crushed red tomatoes
  3. 1 can of black beans
  4. 1 can of dark red kidney beans
  5. 1 can of cannellini beans
  6. 1 chopped green bell pepper
  7. half chopped onion
  8. 2 cups vegetable stock
  9. 1 tsp garlic powder
  10. 1 tsp smoked paprika
  11. 1 tbsp cumin
  12. 1/2 tsp salt
  13. 1/2 tsp black pepper

Optional:

  1. 1 lb ground turkey
    To make this meal with meat, brown ground turkey in a large pan on the stove top with olive oil and season it with garlic powder, cumin, smoked paprika, salt, and pepper. Eyeball it.
  2. 1 dollop of sour cream for topping
  3. Shredded cheddar cheese also for topping
  4. 1 box of store bought mac and cheese
    This is a less healthy way to eat chili, but honestly, chili mac is one of my favorite things and I just can’t help myself. Boxed is easy and the baby loves it LOL

Enjoy your perfect, easy fall meal! We love this on a chilly (get it?) day!
x Abigail